The Canada Dental Benefit* is a national dental care program that will provide benefit payments to cover dental expenses for Canadians with annual household incomes of less than $90,000 and no private dental insurance coverage.
Table of Contents
Why do we need the Canada Dental Benefit?
Did you know that the Medical Services Plan in BC doesn’t cover most procedures related to dental health for the majority of people? Although many Canadians have private dental insurance, some don’t. Some people hesitate to see a dentist due to the cost. The Canada Dental Benefit is a step towards helping Canadians get the dental care they need for good oral health.
When does the program start?
The program is being implemented in stages starting this year, until 2025. This year on December 1, phase 1 will start with children under 12. By 2023, the program will include children under 18, seniors and people living with a disability. By 2025, all uninsured families with an annual household income of less than $90,000 will be eligible.
Who is part of phase 1?
The first phase that is intended to start on December 1 will include children under the age of 12 with an annual family income of less than $90,000, with no private dental insurance. Once the program starts, it will cover dental expenses that were paid retroactive to October 1, 2022. The parents or guardians need to apply for the Canada Dental Benefit through the Canada Revenue Agency.
How much is the benefit?
Depending on your family income and eligibility, you could receive a tax-free benefit payment of up to $650 per child per year.
If your family’s net annual income is less than $70,000, the maximum amount possible per child per year is $650. If your family’s net annual income is between $70,000 to $79,999, the maximum amount possible per child per year is $390. If your family’s net annual income is between $80,000 to $89,999, the maximum amount possible per child per year is $260.
Is the benefit enough to cover all dental work needed?
The cost will depend on various factors.
One factor is whether your child is seeing a general practice dentist or a specialist pediatric dentist. Although all dentists are trained to work with children, pediatric dentists have additional training. A specialist’s fees will be higher compared to general dentists in most cases. If you’re not sure whether your child needs to see a specialist or not and you’re located near the Panorama Ridge and Sullivan Station area in Surrey, you could start by booking an appointment with our dental clinic. Family dentists Dr. Chow or Dr. Bellusci will examine your child’s teeth and discuss what your child needs, and recommend where it could be done.
Other factors include the age and oral health of your child and they can greatly affect how much their dental care would cost. If you would like a more accurate idea of how much a dental visit in Surrey, B.C. would cost, please feel free to contact us for an estimate.
The Canadian Dental Association recommends that children start going to the dentist when they get their first tooth, or when they’re 1 year old, whichever comes first. For majority of children at this age, the benefit amount would be more than enough to cover the visits twice a year. However, a $260 subsidy is typically enough to cover an older child’s first checkup, X-rays, and cleaning. We encourage you to bring your child to the dentist as soon as possible so that small issues, like cavities, can be caught and managed immediately.
*Please note: This article is our understanding of the program and is not meant to be official advice. For details and the most up to date, accurate information, visit the official CRA website.
SDF, or sodium diamine fluoride is a liquid antimicrobial that is applied at the dental office to stop the progression of small cavities. It is a conservative approach to managing dental decay. When applied to a cavity, it can remineralize, or strengthen the cavitated tooth structure. The procedure only takes a few minutes. It’s quick, and doesn’t require any anesthetic.
Frequently Asked Questions
What situations may SDF be recommended For?
Although we usually manage cavities by removing the decay, and placing fillings, it’s not always possible. These are some situations that may benefit from the use of SDF:
for patients with many cavities that can’t be restored right away
when there are behavioural, physical, or medical challenges that may prevent getting other dental procedures done
when there are barriers to accessing dental care
for cavities that are difficult to treat
Can SDF be applied to all cavities?
SDF is used to control early cavities. SDF is not used for very deep cavities that are close to the innermost layer of the tooth (also known as the pulp), or if the tooth is painful. We also avoid using it where esthetics is a concern.
Are there any side effects?
The main side effect is that SDF leaves a brown or black stain when it is applied to dental decay. However, it doesn’t stain healthy, sound enamel.
SDF should not be used on patients with silver allergies, or certain gum and soft tissue conditions.
Is SDF the same as THE fluoride that is Typically applied at the end of cleaning appointments?
No, SDF is different from the topical fluoride treatment you routinely get at dental cleaning appointments. The type of fluoride used at hygiene appointments is mainly aimed at preventing future cavities, not arresting existing ones. That type of fluoride does not leave a stain.
Here are the detailed instructions for making a fabric mask with a filter pocket! Following these steps, we were able to create more than 100 fabric masks for our community during the COVID-19 closure. Why did we make these? It is believed that a fabric mask may play a role reducing the spread of the virus in the community. We wanted to do our part in helping to “flatten the curve”.
Please note that fabric masks are not equivalent to surgical or N-95 masks, and they are not a substitute for social distancing or proper hand hygiene. We strongly encourage you to follow the Government of Canada’s recommendations on the proper use of any fabric mask.
Tools you'll need
scissors
ruler
sewing machine (needle and thread)
clips
iron & ironing board
fabric marker pen
Fabric mask components
Four 18” x 1 ½” strips
Front piece (100% cotton; 9” x 7 ½”)
Back piece (100% cotton; 9” x 6 ½”)
We’re making a mask that’s white at the front.
Some General Tips First!
Always backstitch.
Choose different fabric patterns for the front and back of the mask to easily tell them apart.
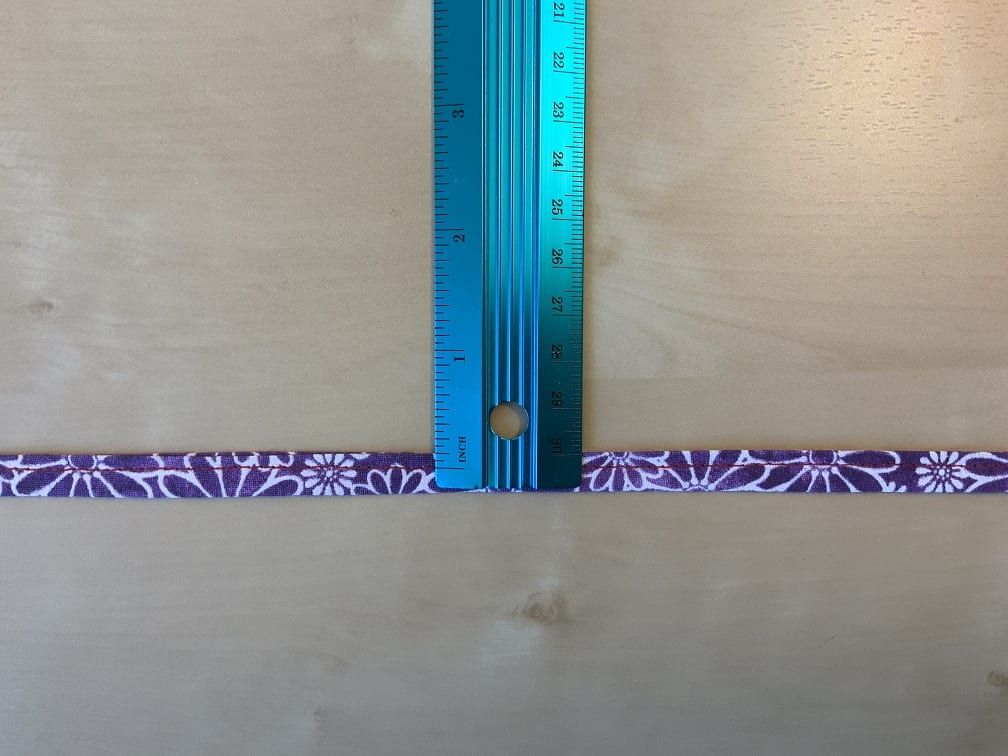
To make your own ties from fabric:
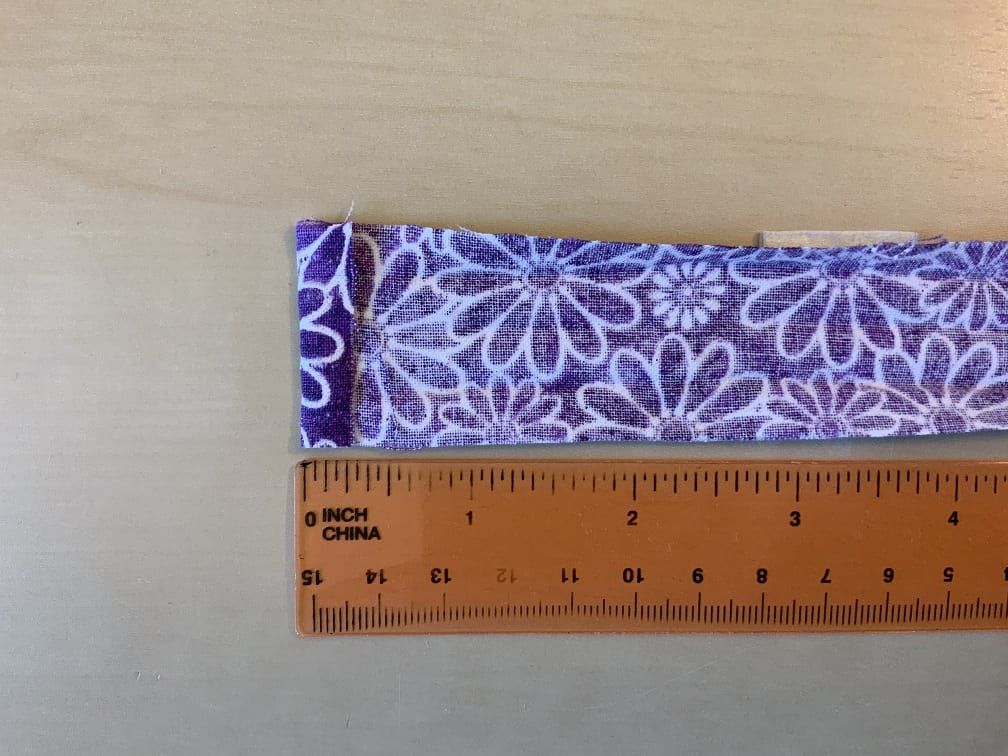
You’ll need 4 pieces of fabric like this (~18” x 1 ½”)
Fold ¼” on one side and iron flat to create a finished end (that won’t fray).
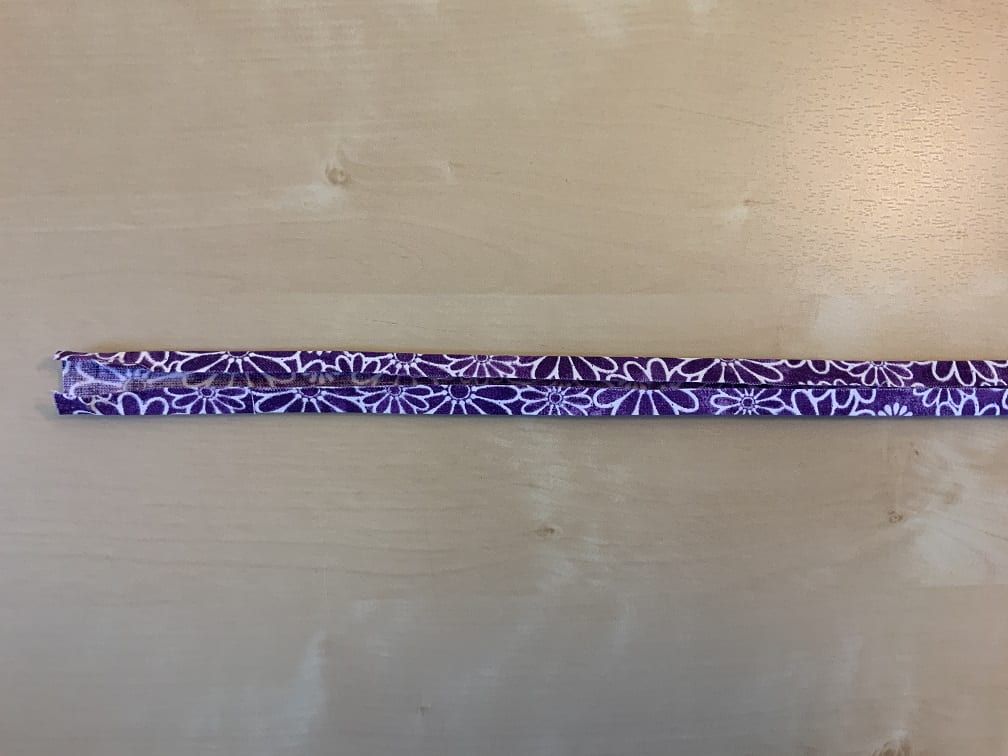
Fold both long sides towards the centre, and iron flat.
Fold in half to encase the raw edges. Iron flat.
Once ironed, it should look like this.
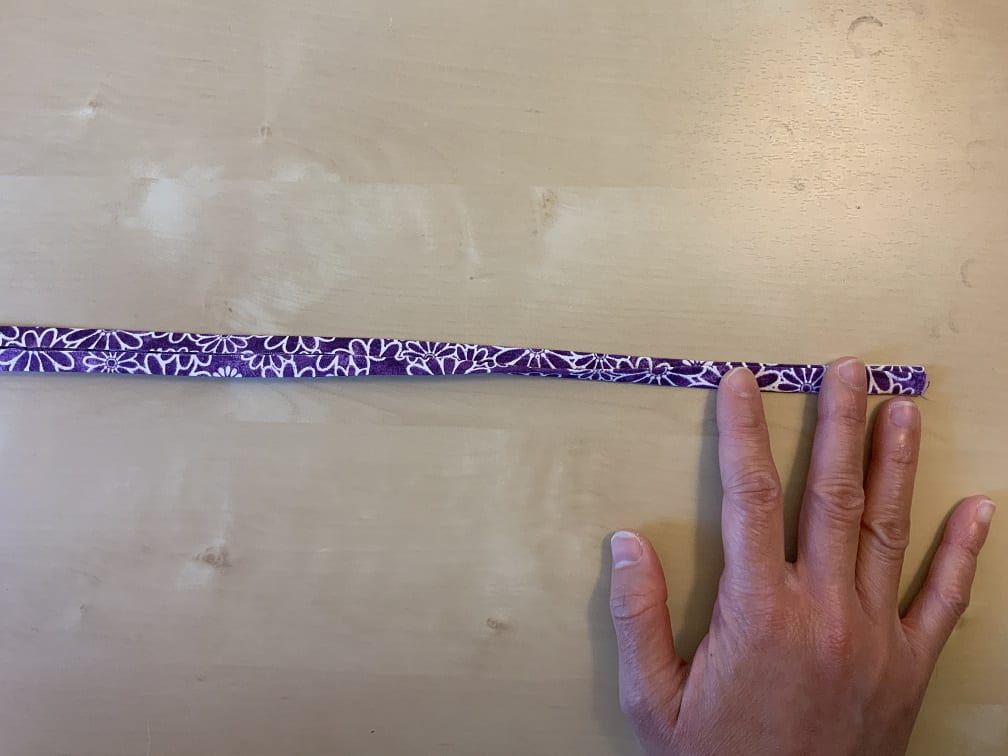
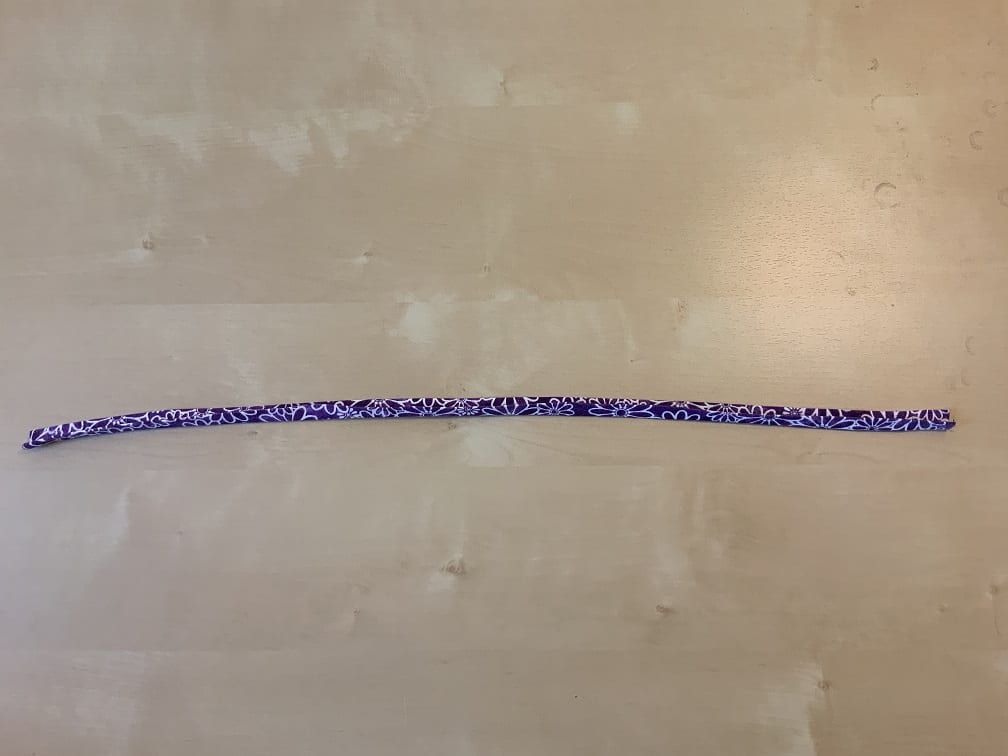
Sew a straight line down the entire length of the strip (~1/8” from the edge). You’ve completed one tie! You’ll need four of these.
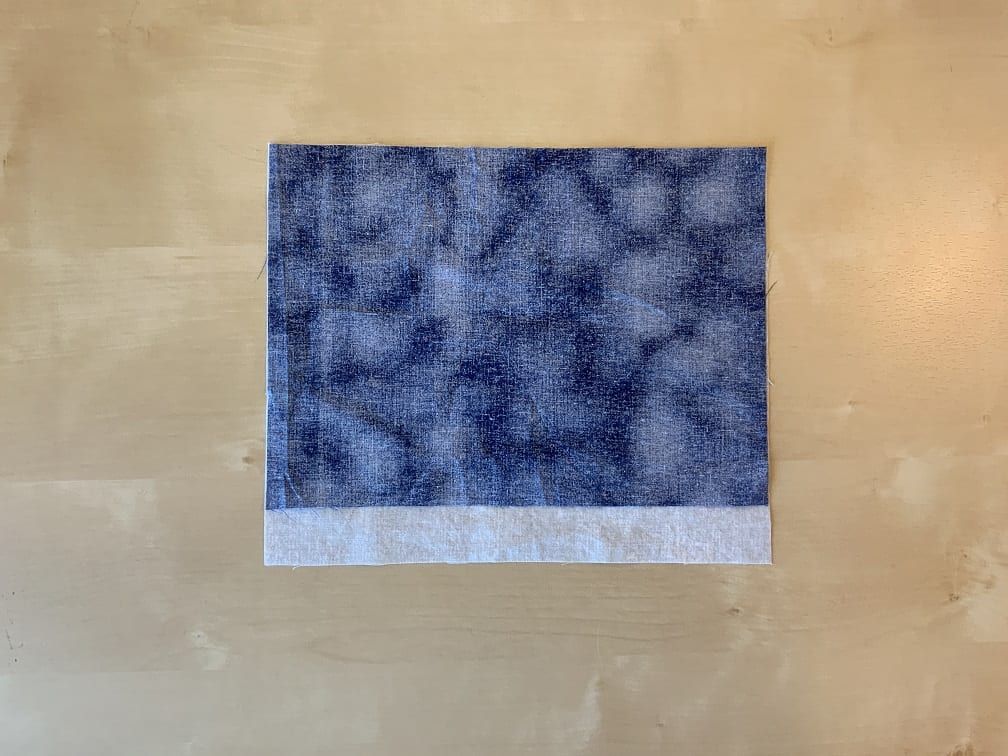
Assemble the fabric components
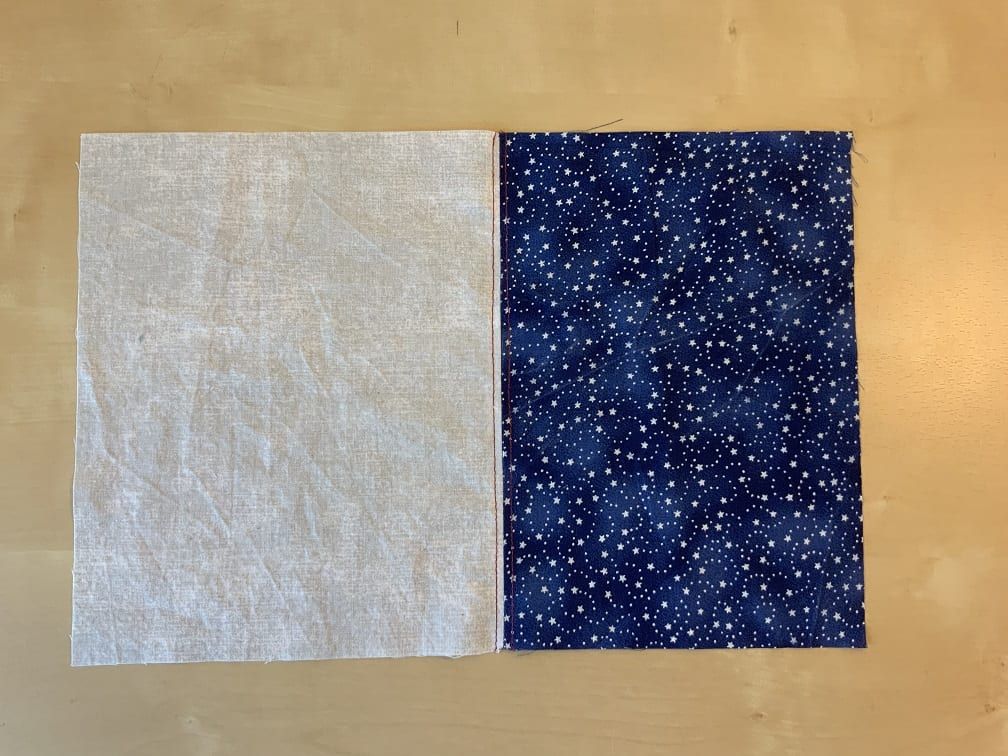
Line up one long edge of the two pieces of fabric.
IMPORTANT: The patterned sides of the fabric should be facing each other.
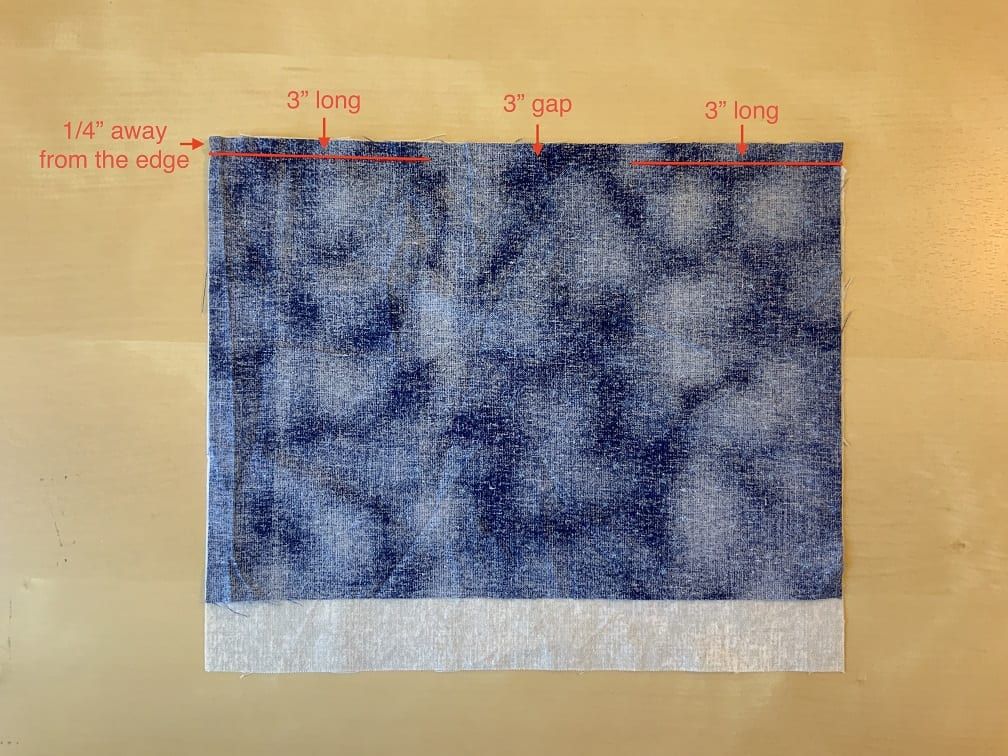
Sew two 3” lines about ¼” away from the lined-up edge. Leave a 3” gap between the lines.
Optional: Iron open the seam and sew straight down the middle of each of the two flaps. This increases durability!
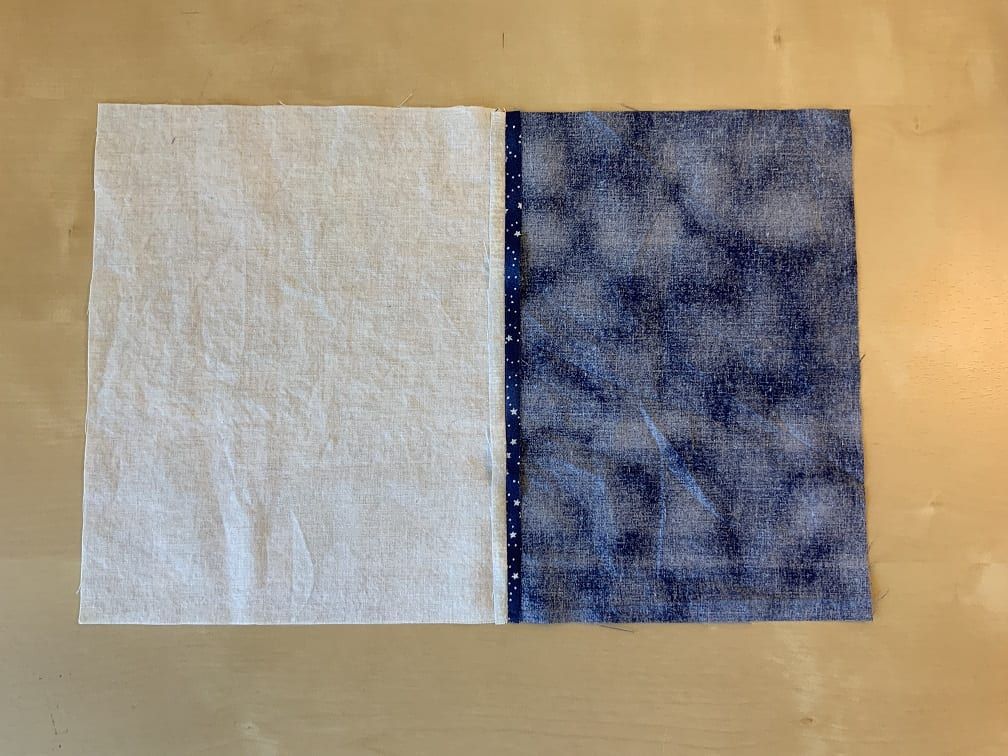
It should look like this on the patterned side.
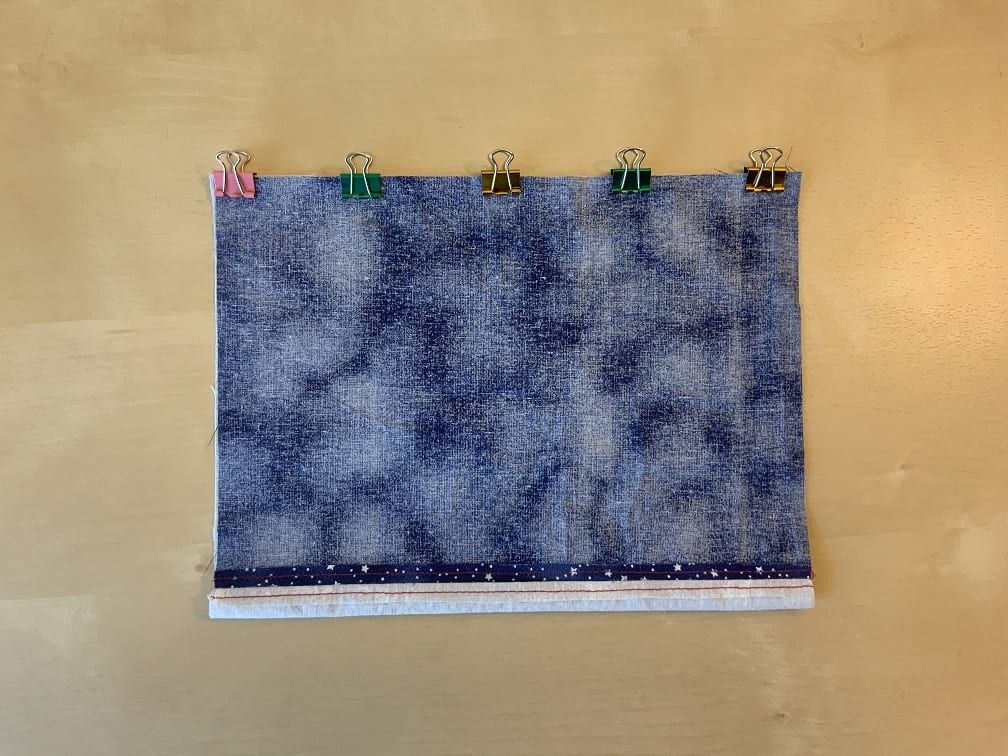
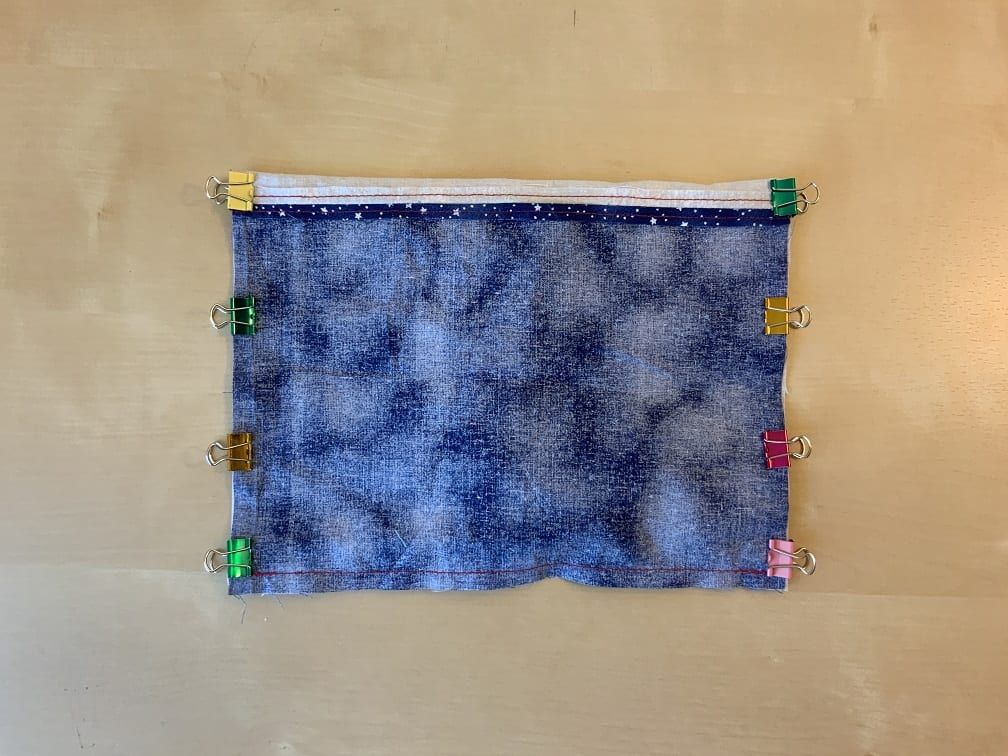
Line up and clip the other long edge with the patterned sides of the fabric facing together.
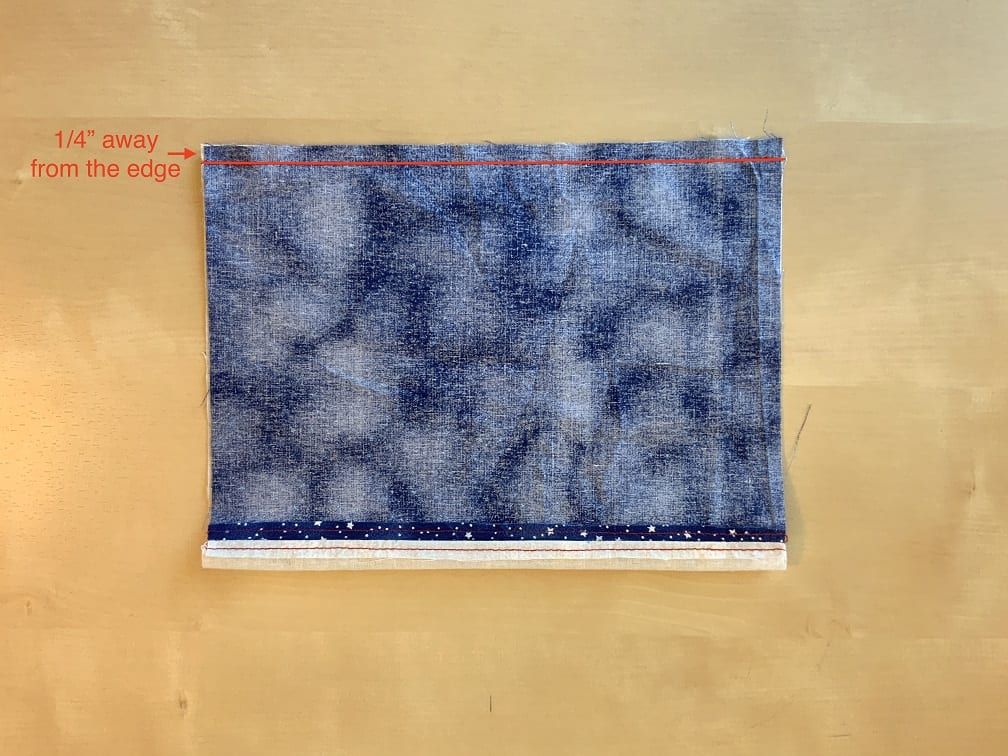
Sew a line ¼” away from this edge all the way across.
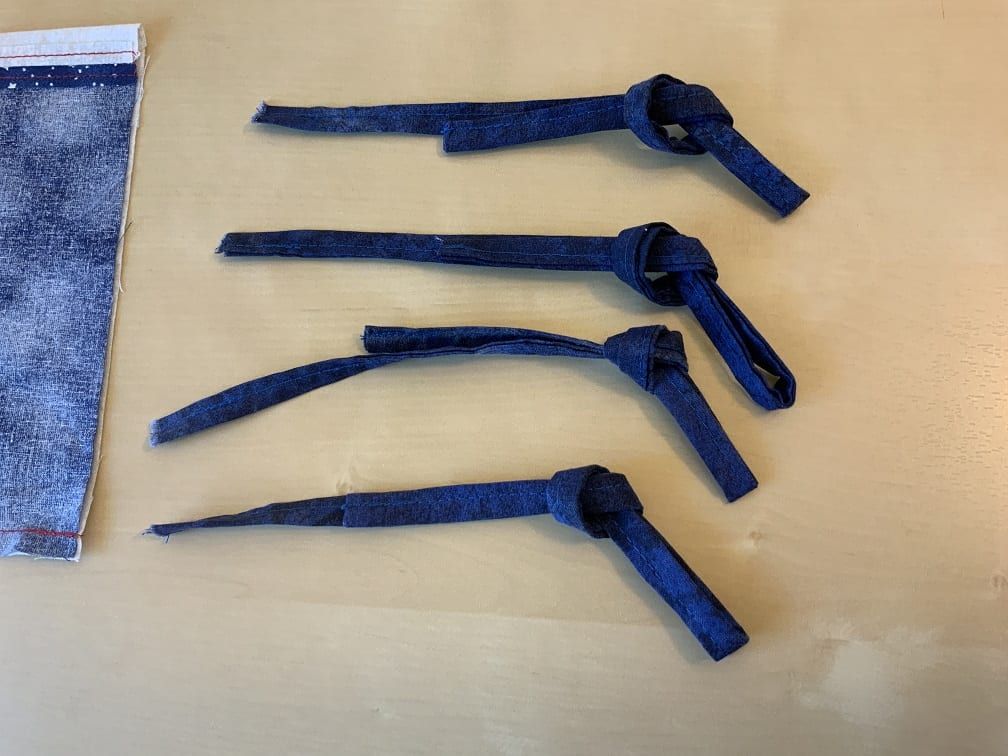
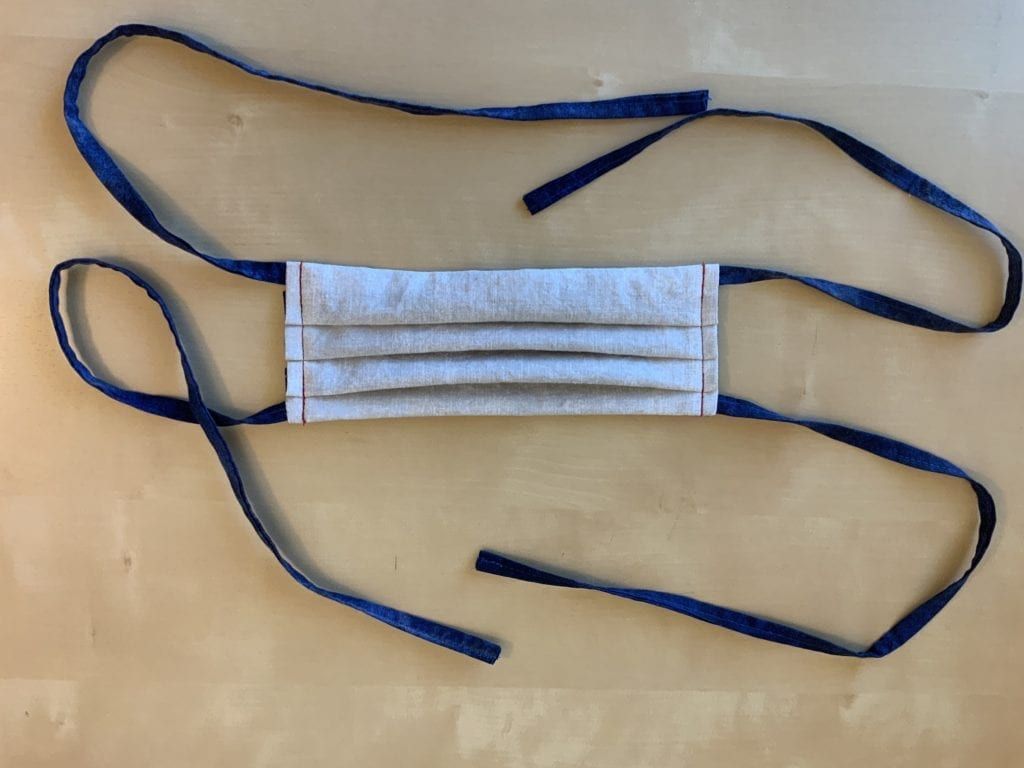
Knot each tie on itself to shorten it.
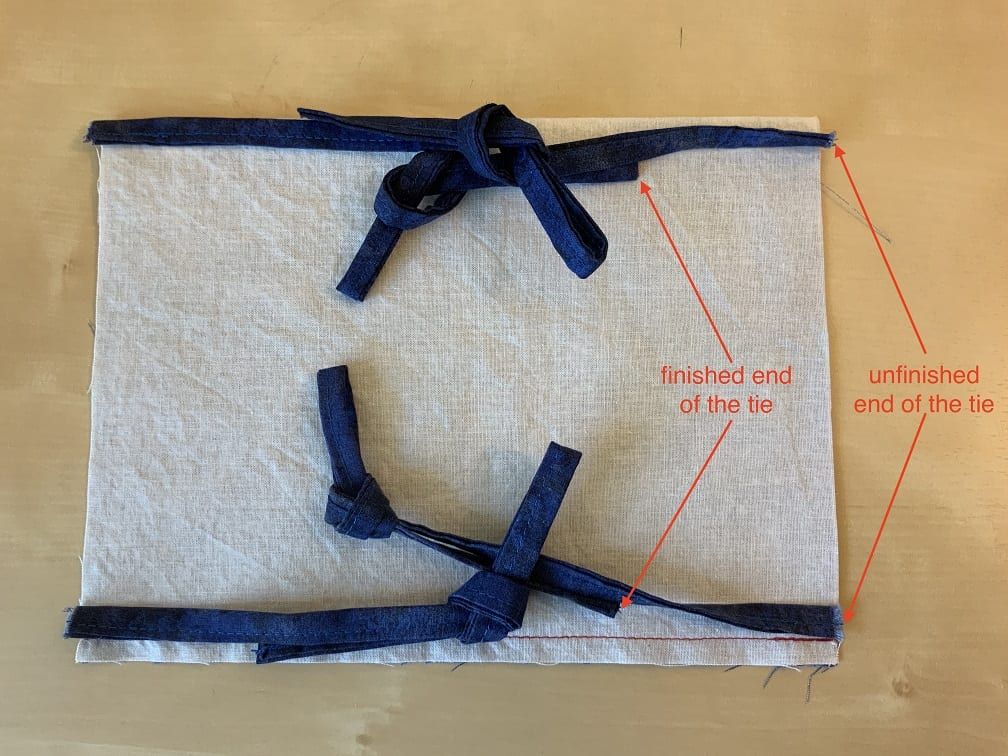
Line up and clip the unfinished end of the tie to each of the four corners on the inside. Position the ties so that they are not visible from the outside.
For illustrative purposes only, the ties in the photo are placed on top of the fabric so you can see how they should be aligned at the corners.
Do NOT place your ties above the fabric. They need to be inside, as shown before.
It should look like this.
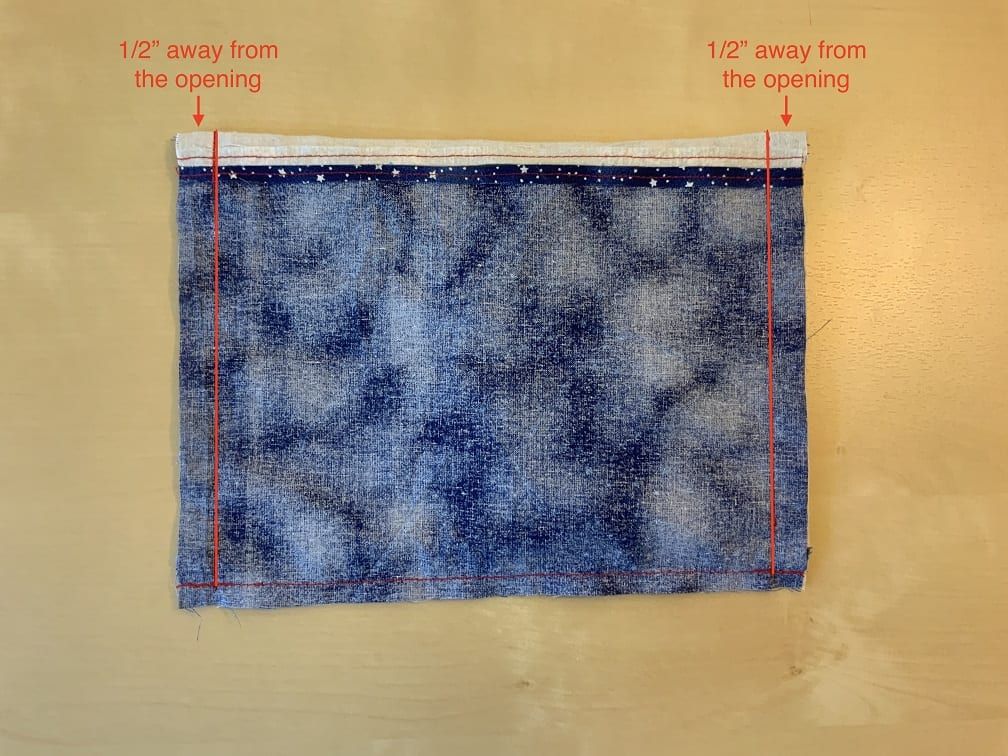
Sew two lines that are ½” away from the open edges. Tip: If you are using a machine, sew slowly, and manually turn the wheel due to the added thickness of the ties.
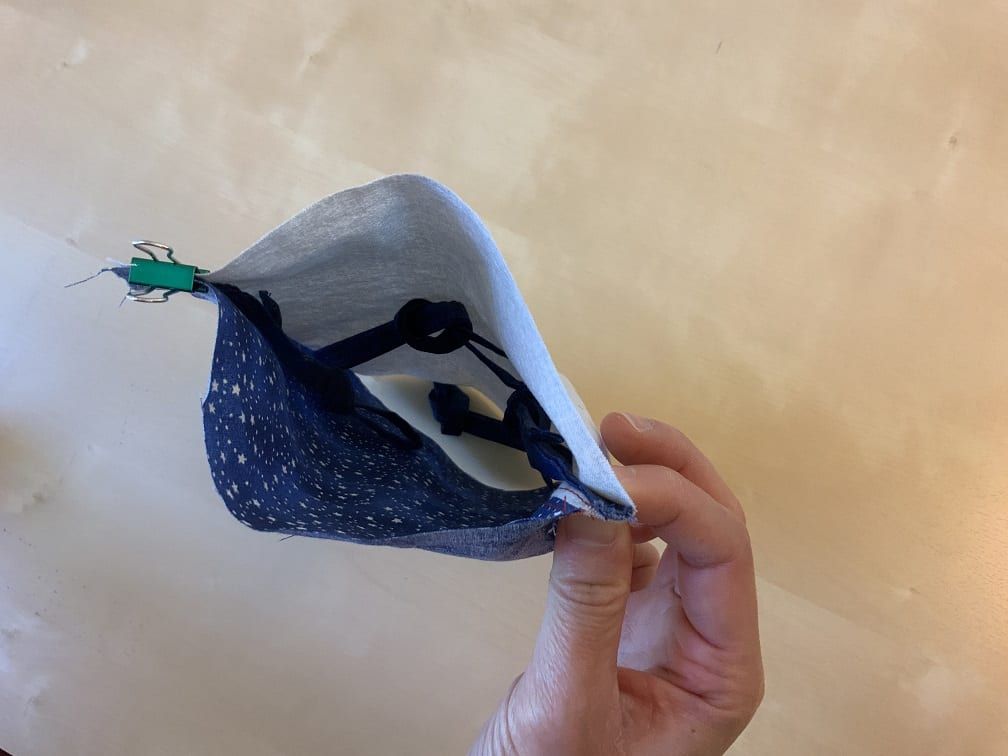
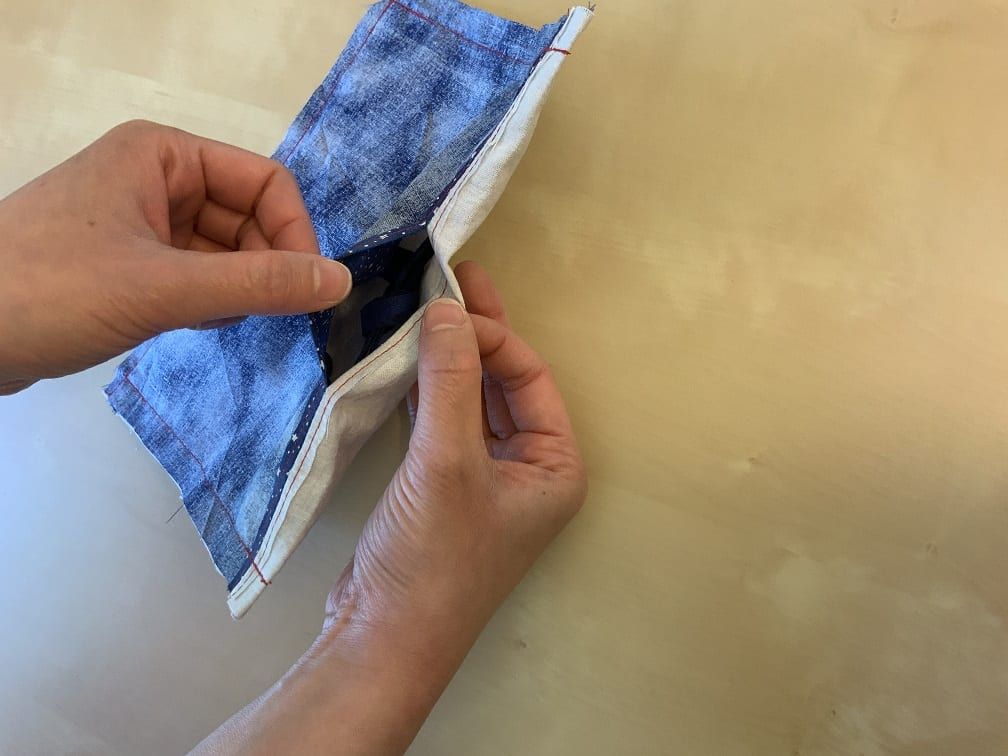
Flip the package inside out through the 3” gap between the two 3” long stitch lines.
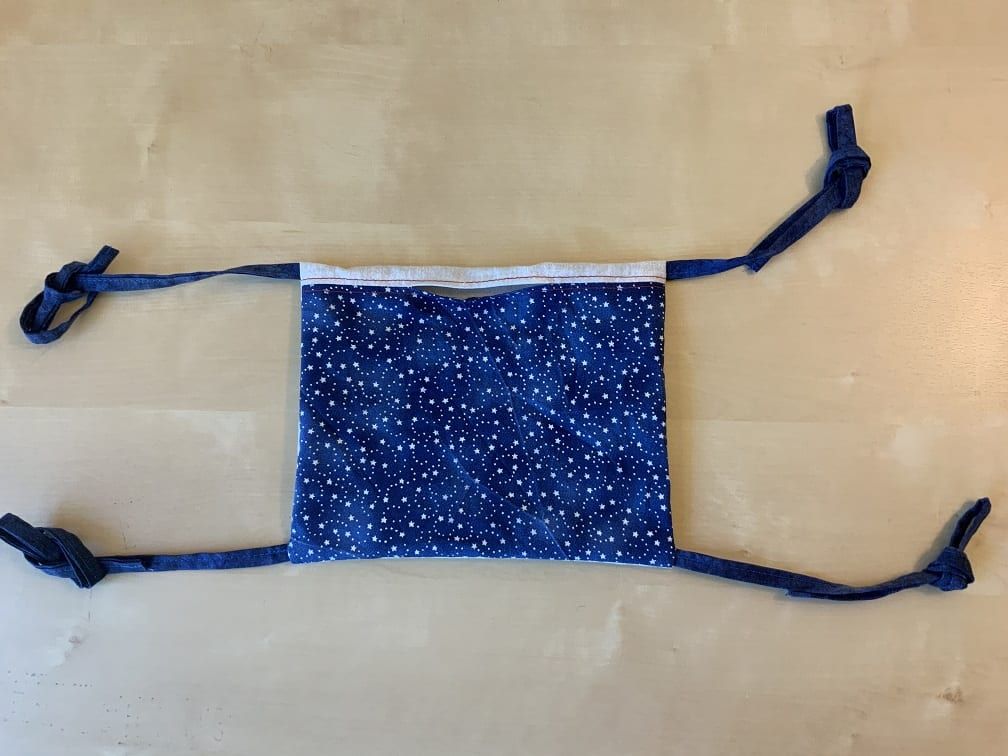
Pull on the straps to straighten the mask.
Tip: Iron the mask to make the edges sharper and easier to pleat.
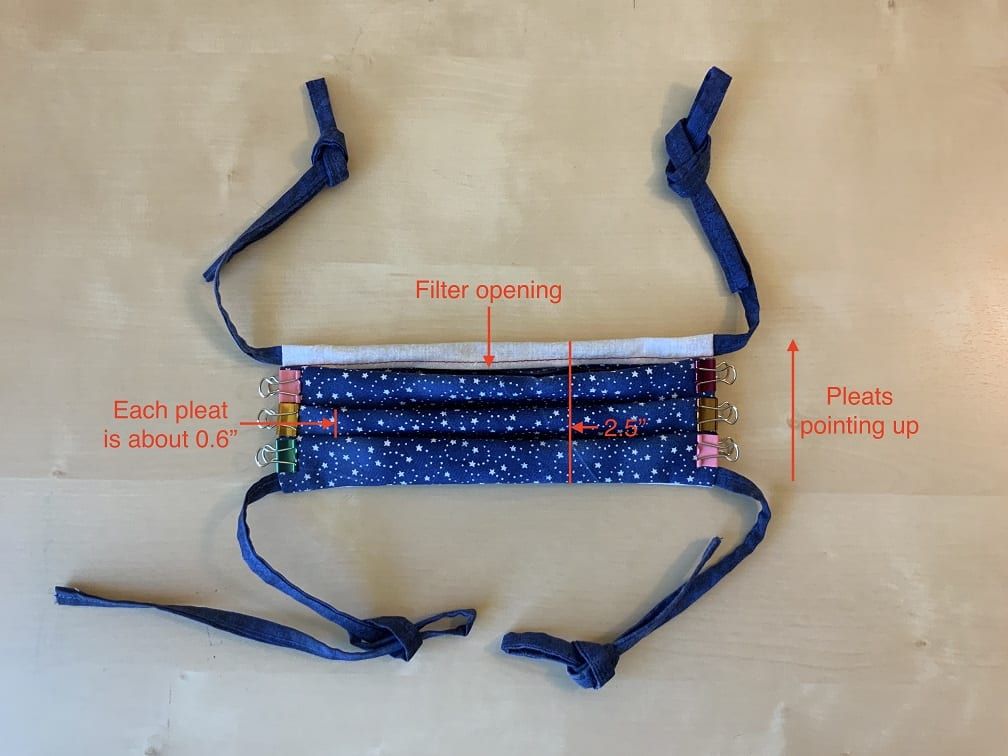
Position the mask with the filter opening visible. Fold and clip three ~9/16” pleats, with the pleats pointing up. Total height of the mask after pleating: ~ 2½”.
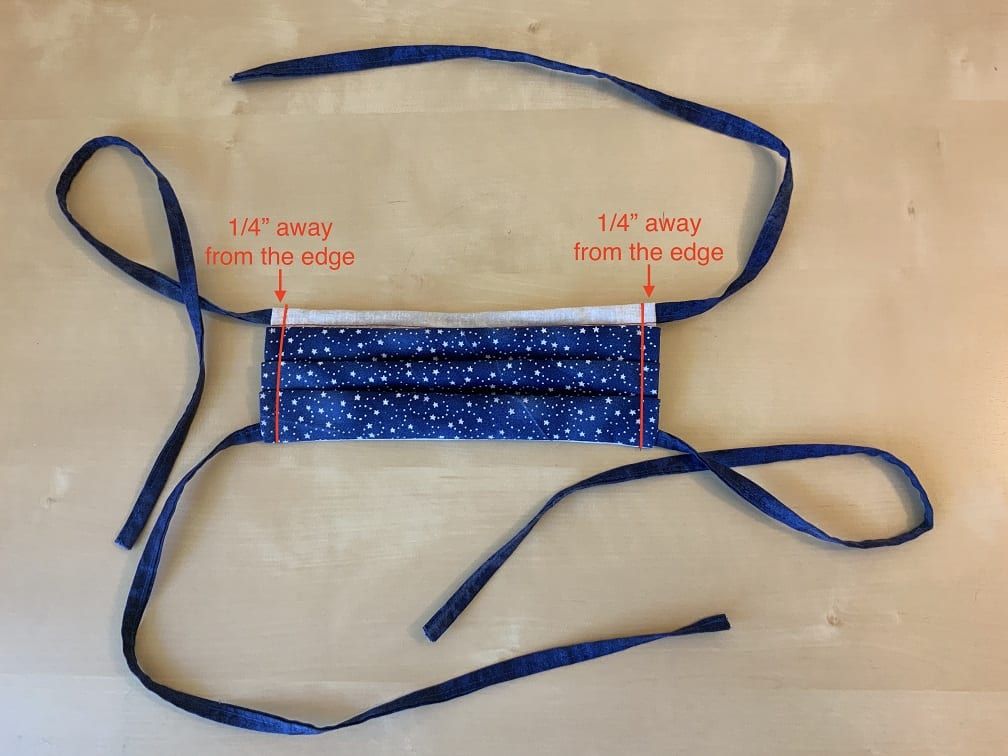
Sew two lines, each ¼” away from the short edge. If your machine is encountering resistance, try going slowly and manually turning the wheel.