The Canada Dental Benefit* is a national dental care program that will provide benefit payments to cover dental expenses for Canadians with annual household incomes of less than $90,000 and no private dental insurance coverage.

Table of Contents

Why do we need the Canada Dental Benefit?

Did you know that the Medical Services Plan in BC doesn’t cover most procedures related to dental health for the majority of people? Although many Canadians have private dental insurance, some don’t. Some people hesitate to see a dentist due to the cost. The Canada Dental Benefit is a step towards helping Canadians get the dental care they need for good oral health.

When does the program start?

The program is being implemented in stages starting this year, until 2025. This year on December 1, phase 1 will start with children under 12. By 2023, the program will include children under 18, seniors and people living with a disability. By 2025, all uninsured families with an annual household income of less than $90,000 will be eligible.

Who is part of phase 1?

The first phase that is intended to start on December 1 will include children under the age of 12 with an annual family income of less than $90,000, with no private dental insurance. Once the program starts, it will cover dental expenses that were paid retroactive to October 1, 2022. The parents or guardians need to apply for the Canada Dental Benefit through the Canada Revenue Agency.

How much is the benefit?

Depending on your family income and eligibility, you could receive a tax-free benefit payment of up to $650 per child per year. 

If your family’s net annual income is less than $70,000, the maximum amount possible per child per year is $650.
If your family’s net annual income is between $70,000 to $79,999, the maximum amount possible per child per year is $390.
If your family’s net annual income is between $80,000 to $89,999, the maximum amount possible per child per year is $260.

Is the benefit enough to cover all dental work needed?

The cost will depend on various factors.

One factor is whether your child is seeing a general practice dentist or a specialist pediatric dentist. Although all dentists are trained to work with children, pediatric dentists have additional training. A specialist’s fees will be higher compared to general dentists in most cases. If you’re not sure whether your child needs to see a specialist or not and you’re located near the Panorama Ridge and Sullivan Station area in Surrey, you could start by booking an appointment with our dental clinic.  Family dentists Dr. Chow or Dr. Bellusci will examine your child’s teeth and discuss what your child needs, and recommend where it could be done.

Other factors include the age and oral health of your child and they can greatly affect how much their dental care would cost. If you would like a more accurate idea of how much a dental visit in Surrey, B.C. would cost, please feel free to contact us for an estimate.

The Canadian Dental Association recommends that children start going to the dentist when they get their first tooth, or when they’re 1 year old, whichever comes first. For majority of children at this age, the benefit amount would be more than enough to cover the visits twice a year. However, a $260 subsidy is typically enough to cover an older child’s first checkup, X-rays, and cleaning. We encourage you to bring your child to the dentist as soon as possible so that small issues, like cavities, can be caught and managed immediately.

*Please note: This article is our understanding of the program and is not meant to be official advice. For details and the most up to date, accurate information, visit the official CRA website.

Teeth can be missing for many reasons, including dental decay, tooth fracture, gum disease, genetics and accidents. If a missing tooth is not replaced, you may notice tipping of the adjacent or opposing teeth into that space over time. These changes can lead to increased wear of certain teeth, or spaces between the remaining teeth where food can get stuck. If you are looking to replace teeth, here are a few options:

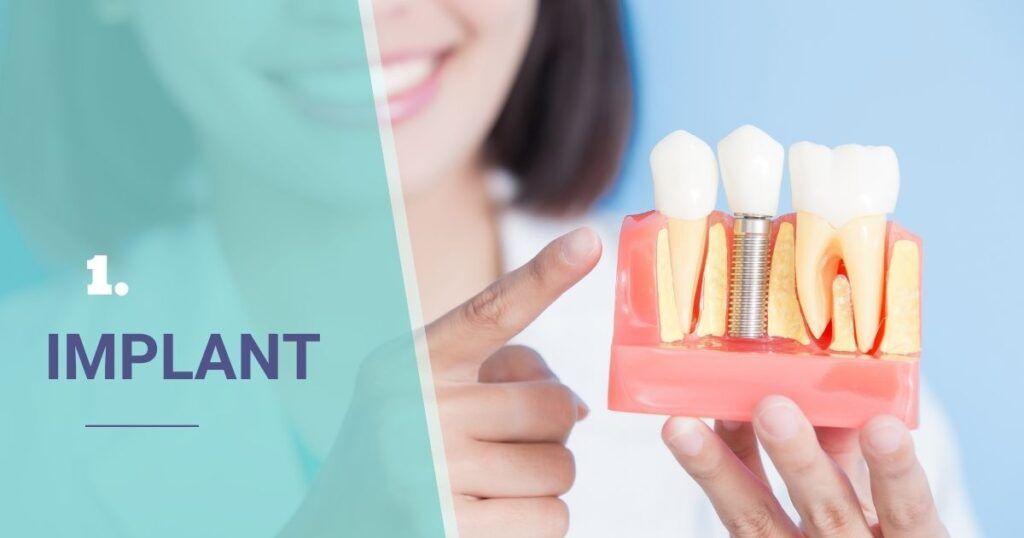
1. Implants
2. Bridges
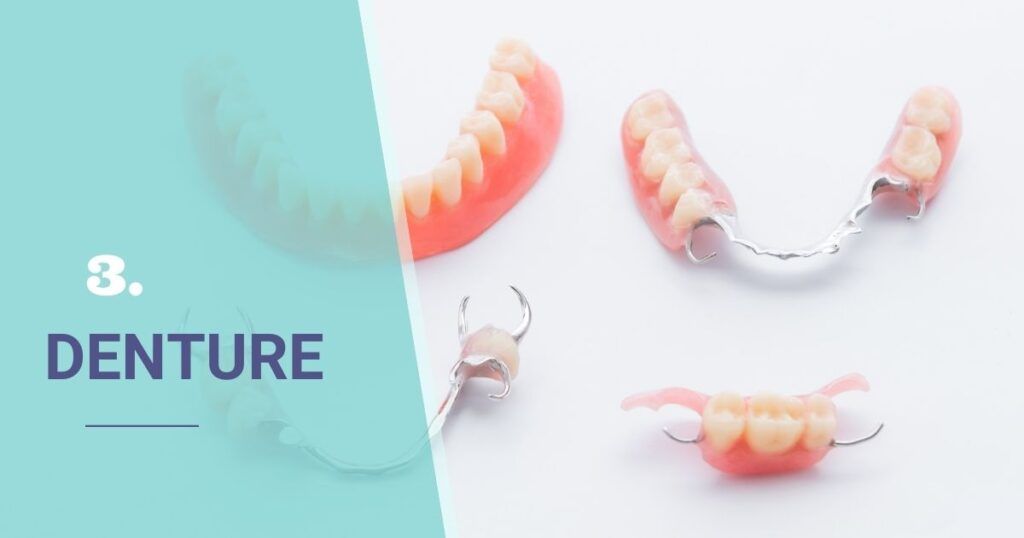
3. Dentures

Dental Implant

What is an implant?

An implant is considered to be the gold standard for replacing missing teeth. It is a post, usually made of titanium, that is surgically placed into the bone where the tooth is missing. The bone is allowed to heal and fuse with the post for a few months before the top portion that you see above the gums, also known as the crown, is attached.

Pros:

  • High success rate.
  • Does not need adjacent teeth for support (unlike a bridge). 
  • When a tooth is lost, the surrounding bone also shrinks, which can lead to esthetic defects, and reduced bone support for the adjacent teeth. An implant will stimulate and maintain the surrounding bone.
  • Easier to keep the neighbouring teeth clean.
  • It is non-removable.

Cons:

  • Requires a surgical procedure.
  • May require a bone graft (the addition of bone material) if the existing bone support isn’t enough.
  • Treatment duration will be at least a few months before the final crown is inserted.
  • Costs more than a denture or a bridge.
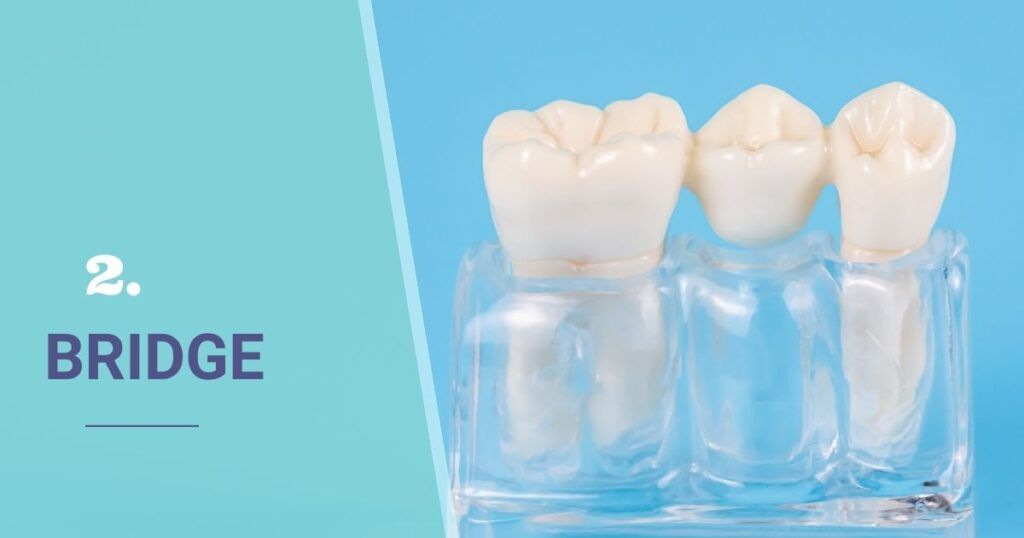
Dental bridge

What is a bridge?

Like implants, bridges are a non-removable prosthesis. Unlike an implant, which replaces the entire tooth including the root, a bridge only fills in the missing crown (chewing) portion that’s visible above the gums. The portion that looks like the missing tooth is called a pontic. For the most common type of bridge, the pontic is connected to crowns that sit on the supporting teeth on each side of the missing tooth. These supporting teeth must first be modified prior to the bridge being inserted.

Pros:

  • Can take as little as two appointments, about two weeks apart. 
  • Does not require surgery.
  • It’s non-removable.
  • Costs less than an implant.

Cons:

  • More difficult to clean under a bridge
  • Costs more than a denture.
  • Supporting teeth need to be modified to support the bridge. The health of these teeth affect the success of the bridge.
  • Does not maintain bone levels.
Dentures

What is a denture?

A denture is a removable prosthesis that can be taken out anytime. Dentures are a more affordable way of replacing multiple teeth. 

Pros:

  • More affordable than a bridge or an implant.
  • Can replace many missing teeth at the same time.
  • The gums and bone shrink over time in the locations where teeth are missing, which may lead to the appearance of the face sagging. A denture can fill in these areas, and support your lips and cheek.
  • Does not require surgery.

Cons:

  • Requires a series of appointments.
  • Although dentures can fill in the appearance of the missing bone, it does not maintain bone levels.
  • Decreased chewing force.
  • It is removable.

Which option is the best for me?

The choice is highly dependent on your individual circumstance and should be discussed with your dentist. There are many factors to be considered, including: 

  • your medical and dental health
  • the way your teeth bite together
  • the number and location of the missing teeth
  • your timeline
  • your financial situation
  • your esthetic preferences

Dentists Near You

If you are missing a tooth, take the first step to book a consultation with our Surrey dentists at Vivant Dental in the  Panorama area.

WHY DO I NEED TO TAKE CARE OF MY CHILD’S BABY TEETH?

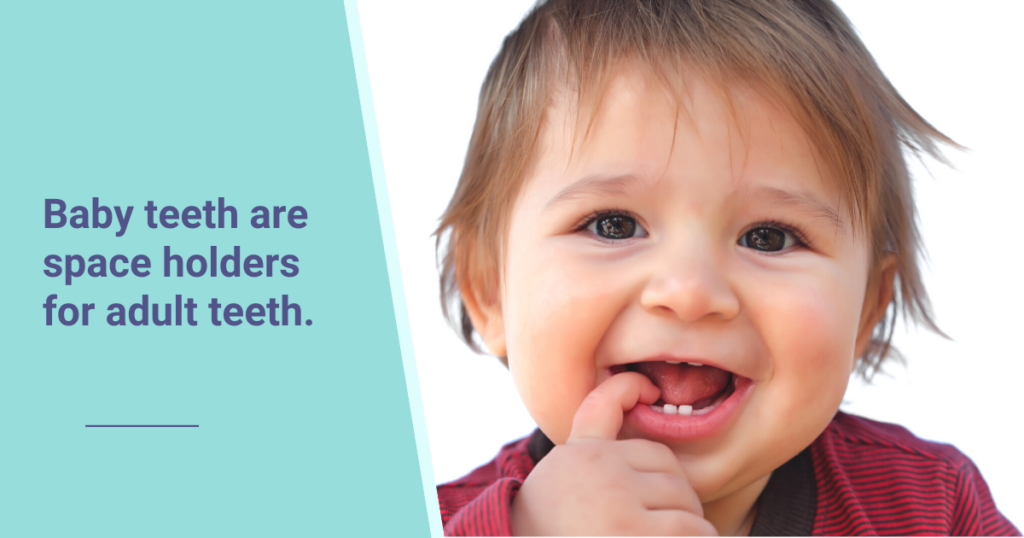
Baby teeth can get cavities just like adult teeth. If the cavity becomes big, the tooth can become painful or even infected. If the baby tooth can’t be saved, it may need to be removed. We all know that teeth are necessary for eating, speaking and smiling, but did you know that baby teeth are also space holders for adult teeth? Baby teeth are meant to stay in place, until your child is around 12 years old. If a baby tooth is removed or lost too early, neighbouring teeth may tip into the space. By the time the adult tooth is finally ready to come out, the space may no longer be big enough for it to come out straight. 
Baby teeth hold space for adult teeth

When Should my Child Start Going to the Family Dentist?

In addition to brushing at home, early checkups are important for maintaining the baby teeth. The Canadian Dental Association recommends that your child’s first visit be within 6 months of the first tooth appearing or by age one, whichever comes first. 
The first dental checkup should be soon after their first tooth comes out or by the age of one.

HOW CAN I PREPARE MY CHILD FOR THE FIRST VISIT?

  • Read a children’s book about going to the dentist.
  • Watch an educational video on YouTube about going to the dentist.
  • Bring your child’s favourite stuffed animal or comforting blanket to the visit.
  • Role-play at home using toys as dentists and patients.
  • Bring your child along to your own dentist appointment. This may help your child get used to the dentist environment.
Role play using toys as patient and dentist.

WHAT IS DONE AT MY CHILD’S CHECKUP VISIT?

  • A ride in the dental chair
  • A review of the medical and dental history.
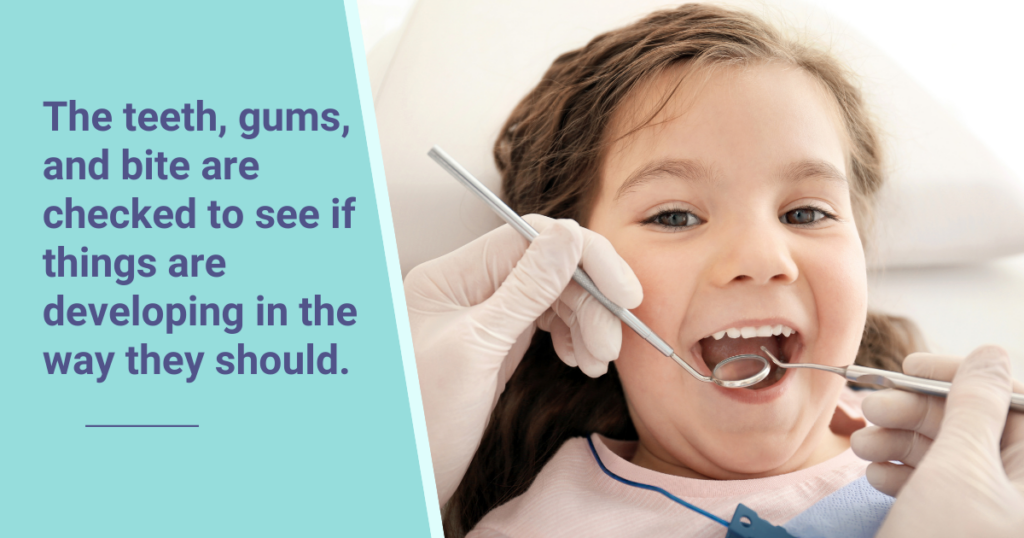
  • A checkup of the teeth, gums, and the bite to see if things are developing in the way they should.
  • Depending on the age and cooperation of your child, x-ray images may be taken to check for cavities and dental development.
  • A gentle cleaning to remove plaque, if applicable.
  • Fluoride treatment, if applicable.
  • A review of home care recommendations, along with what habits to watch out for.
  • A meeting with Twinkles, the unicorn dental puppet, to teach your child good brushing and flossing habits.
  • Your child gets a dental care goodie bag and a prize from the treasure chest at the end of the appointment.
The gums, teeth and bite and checked to see if things are developing as they should.

HOW OFTEN SHOULD MY CHILD GO FOR ROUTINE CHECKUPS?

Generally, routine checkups (also known as recall exams) are recommended every 6 months. However, each child is different, so your child’s suggested frequency may vary..
Routie checkups are generally recommended once every 6 months.

Is my child’s visit covered by BC’s Medical Service Plan (Carecard)?

The visit may be covered by MSP if your child is eligible for the Healthy Kids Program. This government-funded program covers up to $2,000 in basic dental services every 2 years for children in low-income families meeting certain criteria. Vivant Dental is pleased to participate in the Healthy Kids Program in an effort to make dental care more accessible in our community. Contact us to find out if your child has active coverage under this program, or visit the Healthy Kids Program on the BC government website to learn more.

Are there other support programs for my child’s dental care?

  • Private insurance: If you have a private insurance policy, such as from your employer, check if you can add your child to your dental plan.
  • Canada Dental Benefit: This is a new nation-wide program starting December 1, 2022 for children under the age of 12 who do not have access to private dental insurance, and whose families are earning less than $90,000 per year . This program is administered by the Canada Revenue Agency. (Related article: The Canada Dental Benefit – Is it for you?)
  • UBC Children’s Dental Program: The Faculty of Dentistry at the University of British Columbia offers free basic dental services to children of low-income families who are not eligible for other government-funded programs. Treatment is provided by dental students during the school year. Visit the UBC Faculty of Dentistry website for more information.
  • Fluoride Varnish Program: Children under the age of 3 who are not under regular care of a dentist can receive a free cavity risk assessment and fluoride varnish application at various Fraser Health Public health units. Visit the Fraser Health website for a location near you.

Who We Are

Dr. Anthony Bellusci and Dr. Vivian Chow are general dentists and owners of Vivant Dental, located in the Panorama area of Surrey, BC. We enjoy working with kids and we strive to create pleasant dental experiences for . If you have any questions or would like to make an appointment with us, feel free to contact us. 

  1. Stay hydrated! The Canadian Dental Association recommends choosing water as your drink of choice.
  2. Protect your enamel. Bacteria break down sugars to create acids that degrade the mineral structures in your teeth. Therefore, try to limit sugary and acidic foods and beverages. Click here to read more on nutrition.
  3. Brush your teeth twice a day with fluoridated toothpaste. Don’t forget to floss!
  4. Protect your lips from the sun. Long term sun exposure increases the risk of lip cancers. Use UV-protective lip balm with a SPF (sun protective factor) of 30 or higher.
  5. Visit your dental team for regular check-ups and cleanings.
  6. Wear a custom mouth guard while playing sports to reduce the risk of chipped teeth, and to protect against cuts to the soft tissues in the mouth.

This is one of the most common questions patients ask during their filling appointments! We call this device a curing light. 

Many dentists today use LED curing lights in their restorative work. To explain what it does, let us first review what fillings are. When you have a cavity, decayed tooth structure is removed, and restorative material is placed in the cavity to build the tooth back up. 

Tooth-coloured composites fillings are common today because they are very esthetic. Composite materials are malleable when first placed in the cavity, allowing the dentist to adapt it to fit your tooth. Once the material is in place, shining a blue light on it starts a reaction that hardens the composite filling. 

You’ve all heard of dental cavities, but what are they and how do they form? Dentist often refer to cavities and tooth decay as “dental caries”. Caries form over time when certain types of bacteria in your mouth consume sugars and turn them into acids that weaken the mineral structures in your teeth. This process is called “demineralization”. 

Do dental caries need to be Treated?

Teeth are comprised of several layers. Enamel is the outermost layer, and also the hardest. If a cavity is small, and the demineralization is contained in the enamel layer, we may be able to use preventative measures instead of doing a filling. Brushing, flossing, and fluoride applications are examples of preventative measures that can be used while the tooth is monitored. 

ways to restore teeth with caries

If the decay has extended past the enamel, we recommend restorative work, such as a fillings. If the loss of tooth structure is more extensive, crowns (commonly known as caps), and possibly root canal therapy may be needed to save the tooth. Unfortunately, if untreated, cavities can progress to a point where a tooth cannot be saved, and the tooth would have to be removed.

how do i reduce the risk of caries?

  • Limit snacking between the main meals. Each time you eat, your mouth becomes more acidic for a while, which promotes mineral loss.
  • Choose water over sugary beverages.
  • Brush each tooth everyday to reduce dental plaque, which contains harmful bacteria.
  • Use a fluoridated toothpaste or mouth rinse to promote the remineralization of teeth.
  • Consider Xylitol products. Xylitol is a natural sugar substitute that bacteria cannot metabolize into acids. (Keep away from pets.)

Can a tooth develop caries after it has been fixed?

Yes. The tooth structure surrounding your fillings can still be demineralized. Brush, floss, and maintain your teeth even after getting fillings!

Have additional questions? Contact us below.

When you get a professional cleaning at Vivant Dental, we use precisely shaped instruments to remove calculus (also known as tartar) that just can’t be removed at home. Home care is still necessary to help your teeth and gums stay healthy between appointments. 

Ever wondered what toothbrush to use? Drs. Chow and Bellusci answer some commonly asked questions below.

Should I use an electric toothbrush?

With good brushing technique, manual toothbrushes are very effective. However, electric toothbrushes make it easier. With an electric brush, the head oscillates at a consistent speed, so all you have to do is slowly slide the brush from tooth to tooth. Electric brushes often include a timer to help you brush the recommended 2 minutes each time. Some even have pressure indicators ensure that you’re using the right amount of force.

Soft or medium bristles?

Your toothbrush, whether manual or electric, should have soft or ultra soft bristles. Medium or hard bristles may cause damage to your teeth and gums. Some brush heads include a combination of shorter and longer bristles, bristles at different angles, and occasionally rubber extensions to get to difficult-to-reach areas. 

What shape of brush head do I need?

Brush heads come in all different shapes. Round heads, due to their smaller size allows for easier access to different surfaces. Long heads clean several teeth at a time, but may be difficult to use in tight spaces, such as behind the back molars. Specially shaped heads suited to brushing around braces or areas of recession are also available. Ask your dentist about these!

WHEN DO I NEED TO CHANGE MY TOOTHBRUSH (OR BRUSH HEAD)?

The Canadian Dental Association recommends you change your toothbrush every 3 months. Also, check the bristles – if the tips are fraying, it’s time for a new one!

What about TOOTHbrushes for children?

For children, we recommend soft-bristled toothbrushes as well. Children’s toothbrushes are generally smaller than adult toothbrushes and may include handles that allow for an easier grip. They usually have bright, colourful features that make them visually attractive to children. Manual toothbrushes are age-rated, with different sizes for each age category. When children are old enough to use them, electric brushes are great for removing plaque. 

Ask us about toothbrushes and brushing techniques at your next visit. Book your checkup and cleaning today.

You’re missing a tooth that you want to replace. Perhaps you’re undecided about your final treatment plan, or perhaps you’ve made up your mind, but it will be a while before you can proceed with an implant or bridge. What can be done in the meantime to fill that space? One common option is to mask the missing space by wearing a removable acrylic denture (aka a flipper).  Another option is an “Essix” appliance. 

Clear trays

If you’ve come across Invisalign orthodontic treatment, Essix retainers may already look familiar.  Essix retainers are clear, removable trays that fit over the upper or lower teeth. In situations where there are missing teeth, tooth-coloured filling material can be added inside the tray where teeth are missing. When you wear the Essix appliance, your missing teeth are filled in by the material in the tray, making it look like the teeth are actually there. The shade of the filling material can be selected to blend with your adjacent teeth for a more esthetic result. 

What does the process entail?

Essix trays require some stable teeth in the mouth for support, so this is not a solution for everyone with missing teeth. Book an appointment with one of our dentists to determine if an Essix retainer is right for you. If Dr. Chow or Dr. Bellusci determines that your teeth are suitable for this appliance, then impressions are taken of your teeth at our office in Surrey to make the clear customized tray(s). The appliance will be tried in at your second appointment. The fit of the appliance is checked and adjusted, if necessary. Freezing and drilling of teeth are usually not required.

Why is this a short-term solution?

It’s important to understand that these appliances are there primarily for esthetics. These trays do wear over time with use, and they should also not be worn while eating and drinking.  


It’s never too early to think about your baby’s dental health. These tips will answer some commonly asked questions about caring for the teeth of your little one. 

What should I do if there are only a few teeth, or no teeth yet?

Well before the first tooth comes in, you can establish healthy habits by cleaning your child’s gums with a clean, damp cloth. When the first tooth comes in around the age of 6 months, it’s time to start brushing! Caregivers should use a soft-bristled toothbrush with a small head. Simply wet the bristles and gently brush all tooth surfaces and gums at least twice a day. You may find that brushes with bigger handles are easier to hold. The use of fluoridated toothpaste should be discussed with your dentist, and if recommended, the amount should be no bigger than a grain of rice.  

Should I start flossing baby teeth?

Baby teeth usually come out with spaces between them – you only need to floss places where the teeth are touching. This typically happens around the ages of two to three years when most of the baby teeth have come in. Try flossers with handles if you find yourself struggling with traditional floss! Please note that most children don’t have the ability to brush or floss properly until age six. This is your area to shine! While you’re in the mouth, also lift the lip, and check for any discoloured spots or pitting on the teeth that may indicate decay.

When should I bring my child to the dentist?

The Canadian Dental Association recommends the first visit within 6 months of the first tooth coming in, or by the age of one. In addition to eating, baby teeth serve a crucial role as placeholders for adult teeth. If lost early to decay, other teeth may drift into the space and block the adult teeth from coming in straight. This is why regular dental checkups are important throughout childhood.

The dentists and team Vivant Dental in Surrey provide dental care to children. You can download the toothbrushing chart that Drs. Chow and Bellusci have provided during their presentations to children at early learning centres. We invite you and your little one to visit our child-friendly office!

Here are the detailed instructions for making a fabric mask with a filter pocket! Following these steps, we were able to create more than 100 fabric masks for our community during the COVID-19 closure. Why did we make these? It is believed that a fabric mask may play a role reducing the spread of the virus in the community. We wanted to do our part in helping to “flatten the curve”. 

Please note that fabric masks are not equivalent to surgical or N-95 masks, and they are not a substitute for social distancing or proper hand hygiene. We strongly encourage you to follow the Government of Canada’s recommendations on the proper use of any fabric mask.

Tools you'll need

  • scissors
  • ruler
  • sewing machine (needle and thread)
  • clips
  • iron & ironing board
  • fabric marker pen

Fabric mask components

  • Four 18” x 1 ½” strips
  • Front piece (100% cotton; 9” x 7 ½”)
  • Back piece (100% cotton; 9” x 6 ½”)

We’re making a mask that’s white at the front.

Fabric components for fabric mask

Some General Tips First!

Always backstitch.

Choose different fabric patterns for the front and back of the mask to easily tell them apart.

To make your own ties from fabric:

Mask tie of Fabric Mask

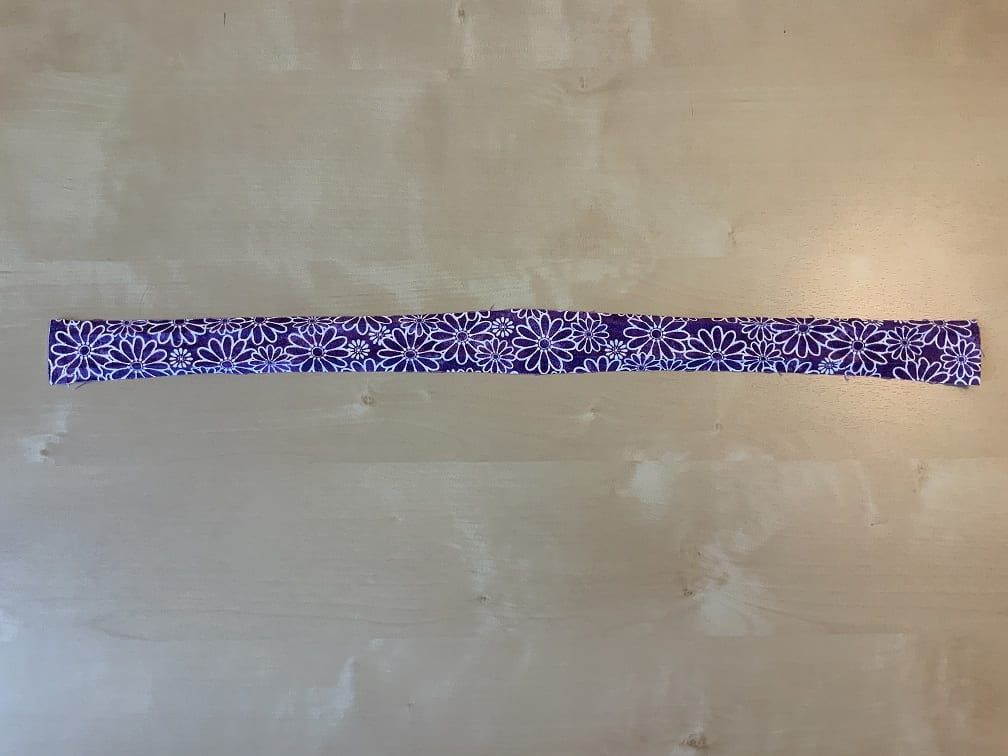
You’ll need 4 pieces of fabric like this (~18” x 1 ½”)

Fabric Mask tie

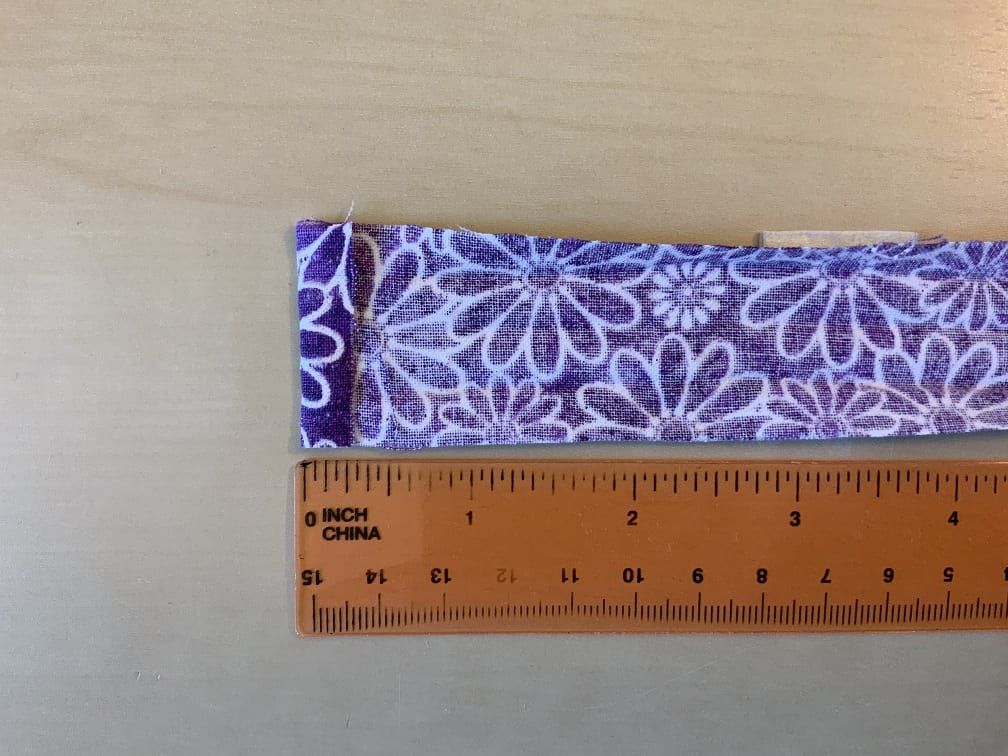
Fold ¼” on one side and iron flat to create a finished end (that won’t fray).

Fabric Mask tie

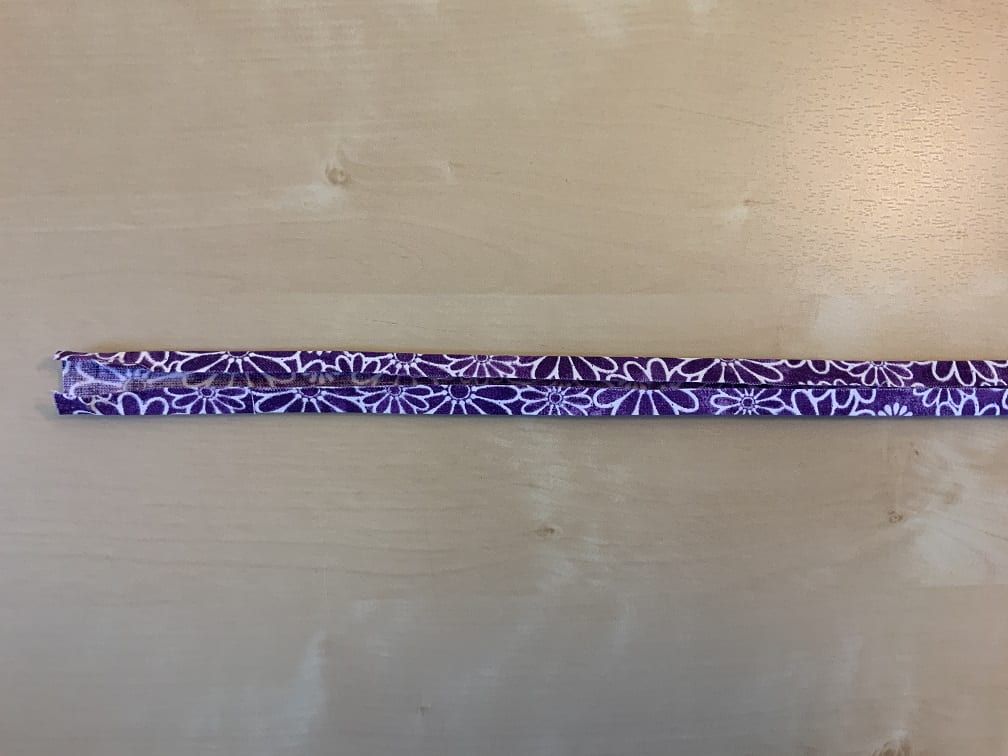
Fold both long sides towards the centre, and iron flat.

Fabric Mask tie

Fold in half to encase the raw edges. Iron flat.

Fabric Mask tie

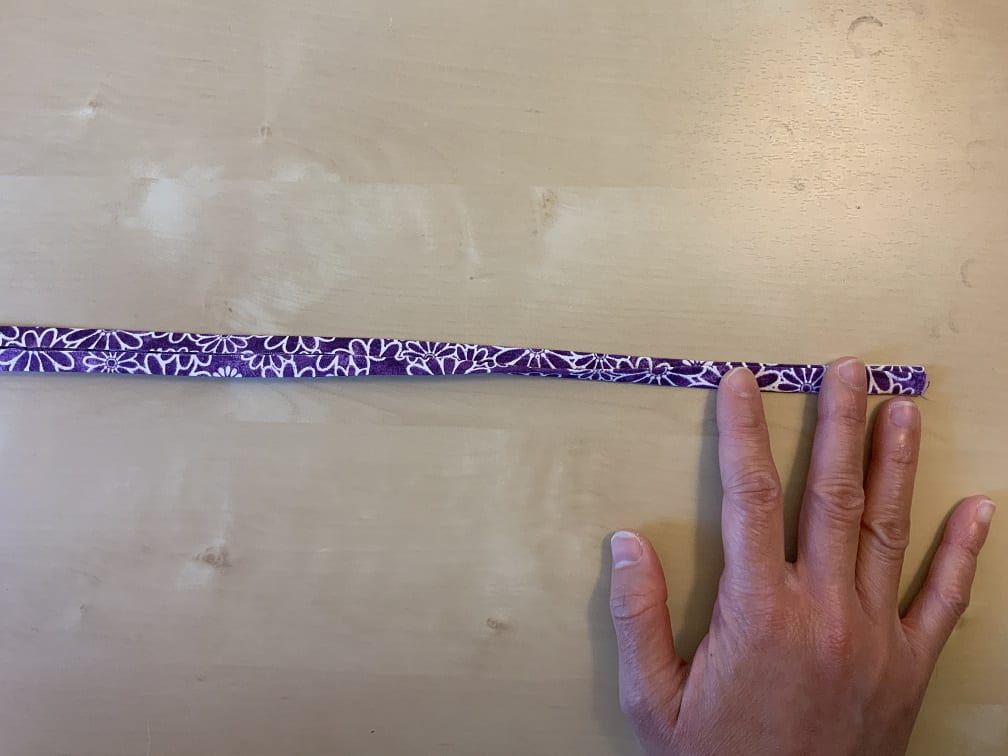
Once ironed, it should look like this.

Fabric Mask tie

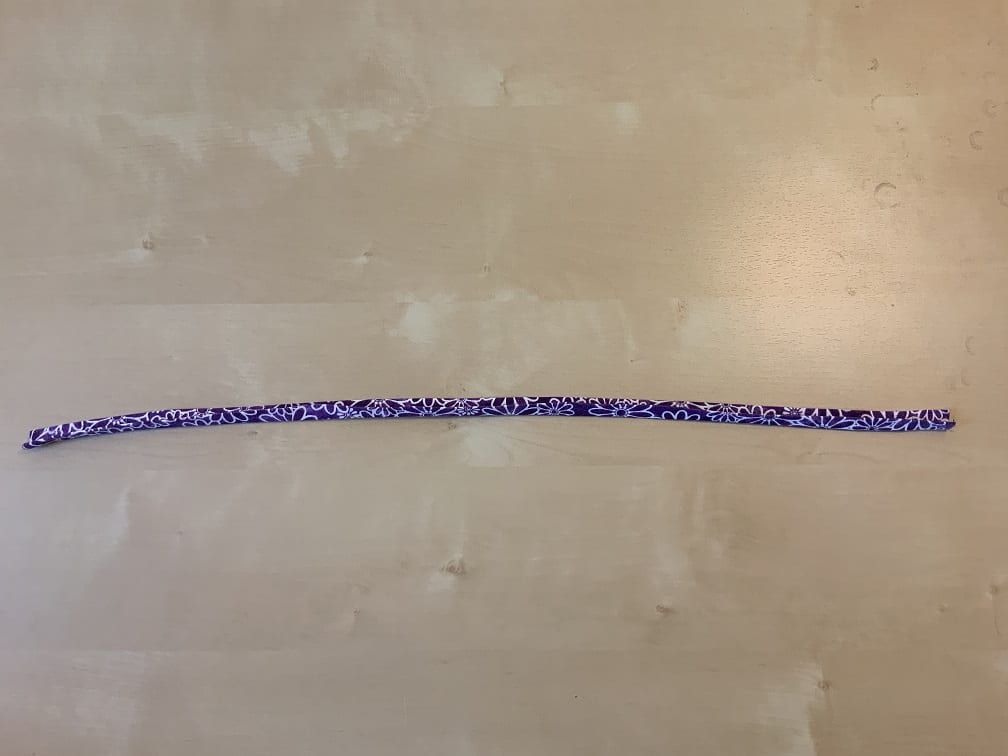
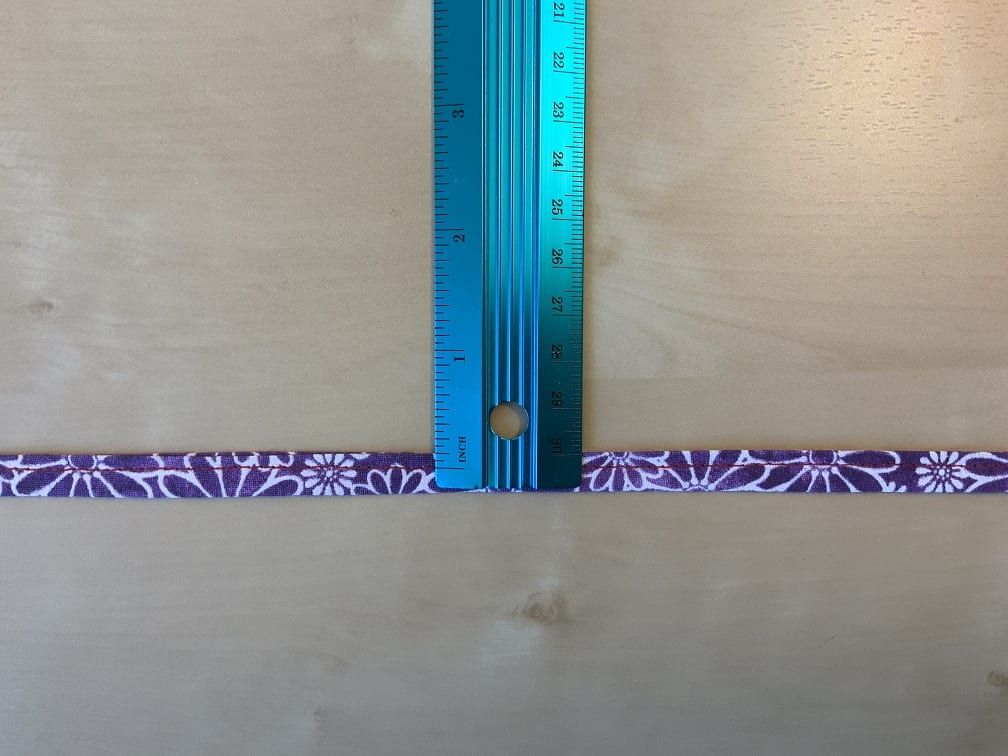
Sew a straight line down the entire length of the strip (~1/8” from the edge). You’ve completed one tie! You’ll need four of these.

Assemble the fabric components

Fabric Mask Assembly

Line up one long edge of the two pieces of fabric.  

IMPORTANT: The patterned sides of the fabric should be facing each other.

Fabric Mask Assembly

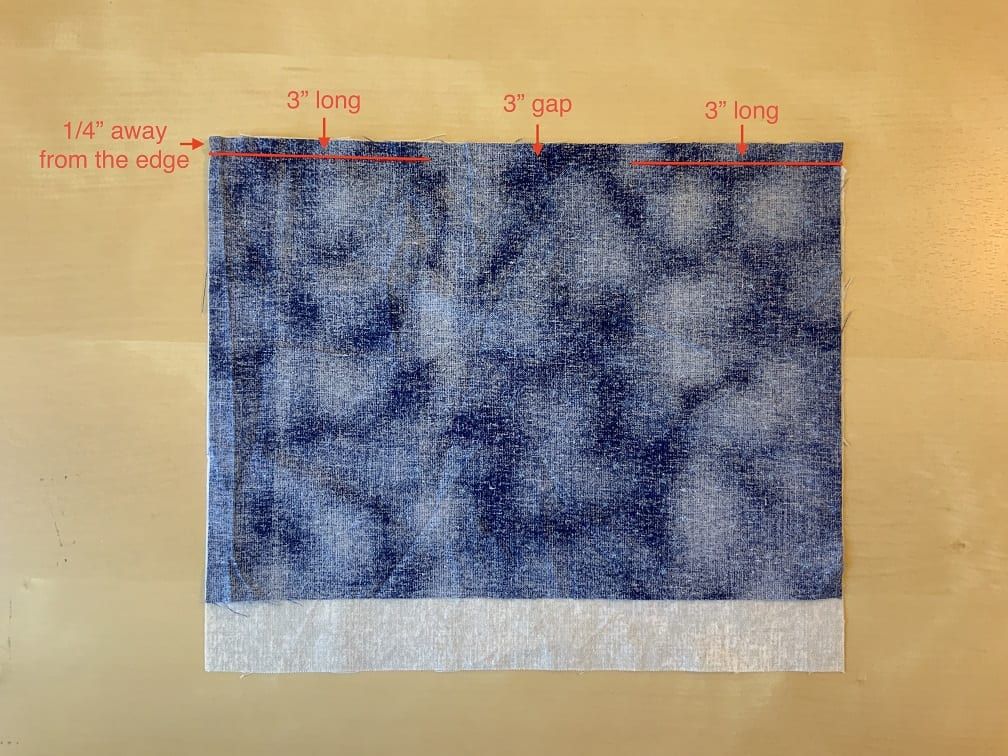
Sew two 3” lines about ¼” away from the lined-up edge. Leave a 3” gap between the lines.

Fabric Mask Assembly

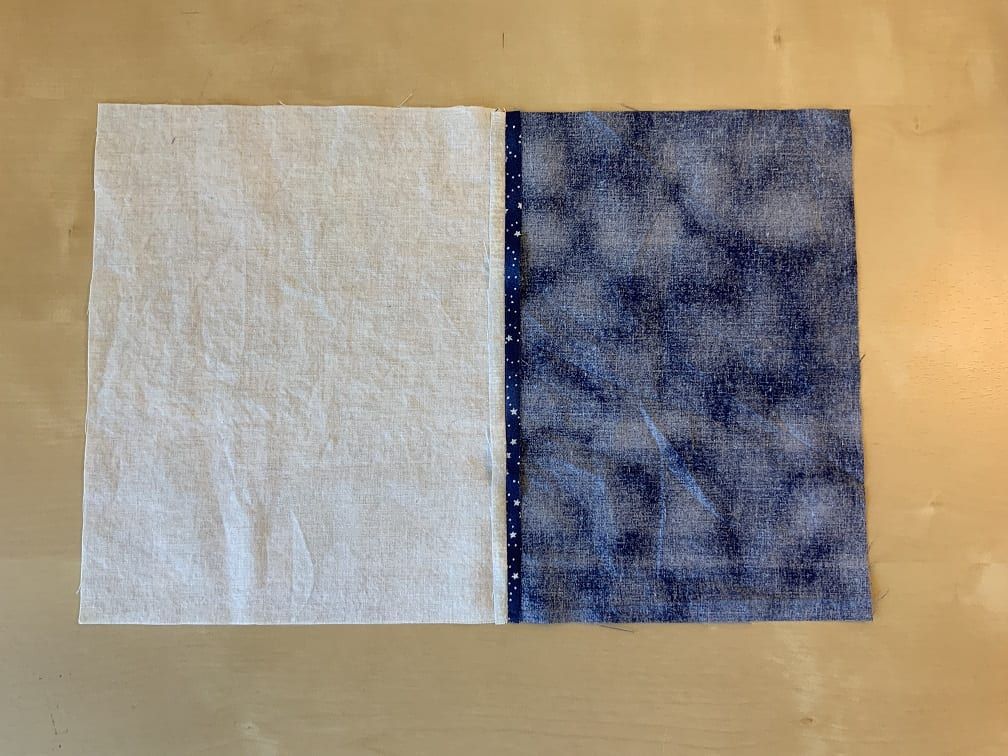
Optional: Iron open the seam and sew straight down the middle of each of the two flaps. This increases durability!

Fabric Mask Assembly

It should look like this on the patterned side.

Fabric Mask Assembly

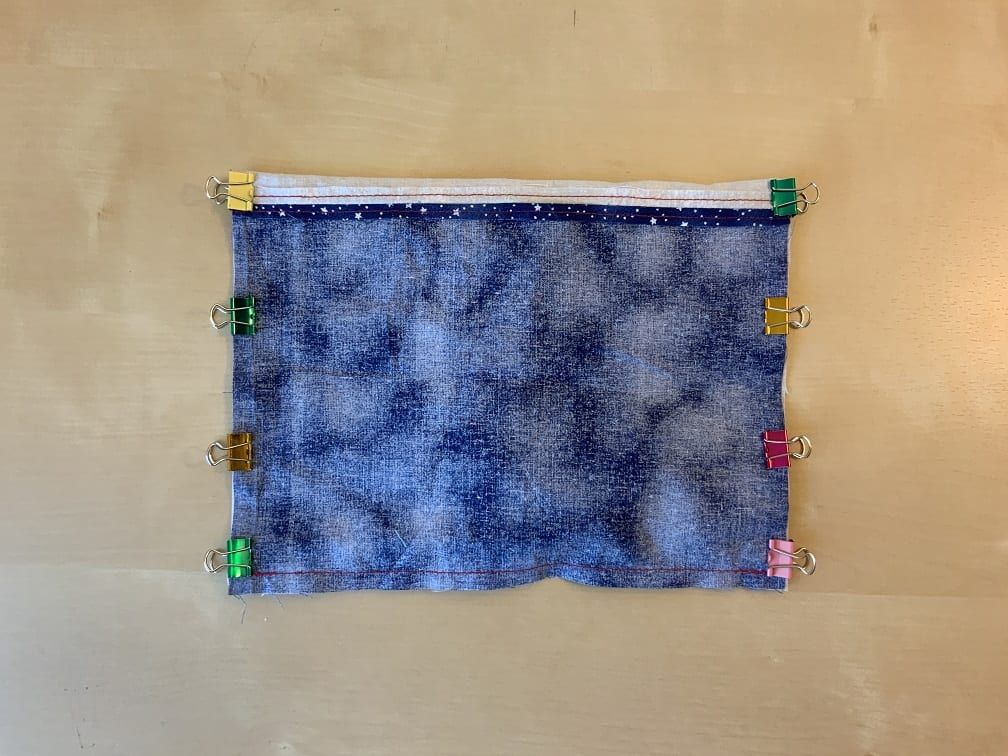
Line up and clip the other long edge with the patterned sides of the fabric facing together.

Fabric Mask Assembly

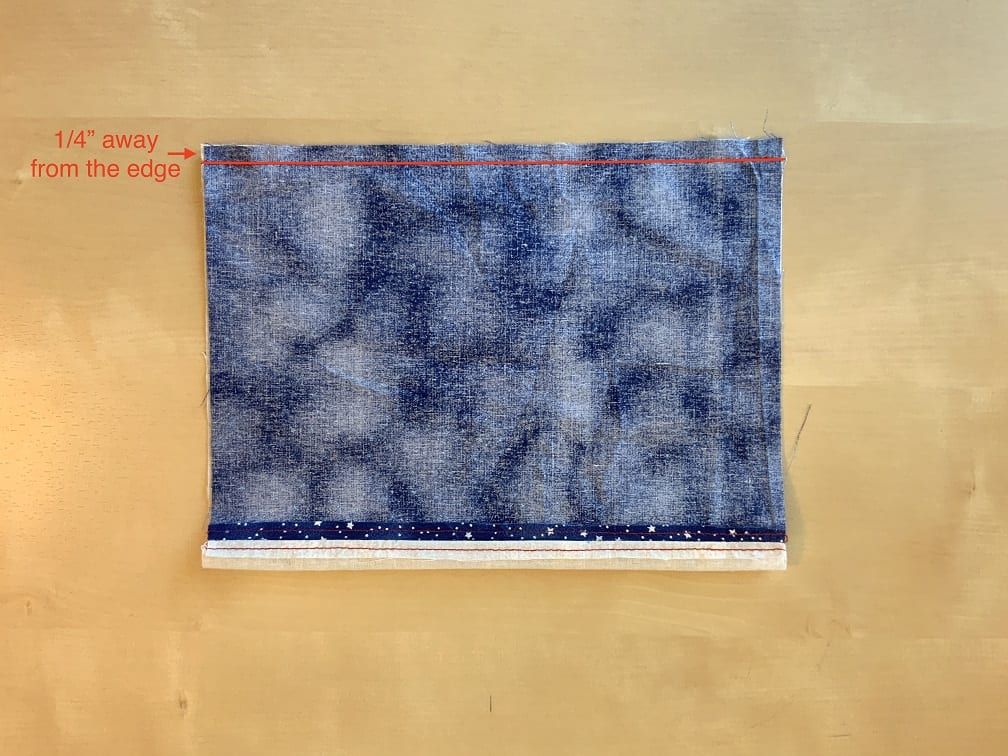
Sew a line ¼” away from this edge all the way across.

Fabric Mask Assembly

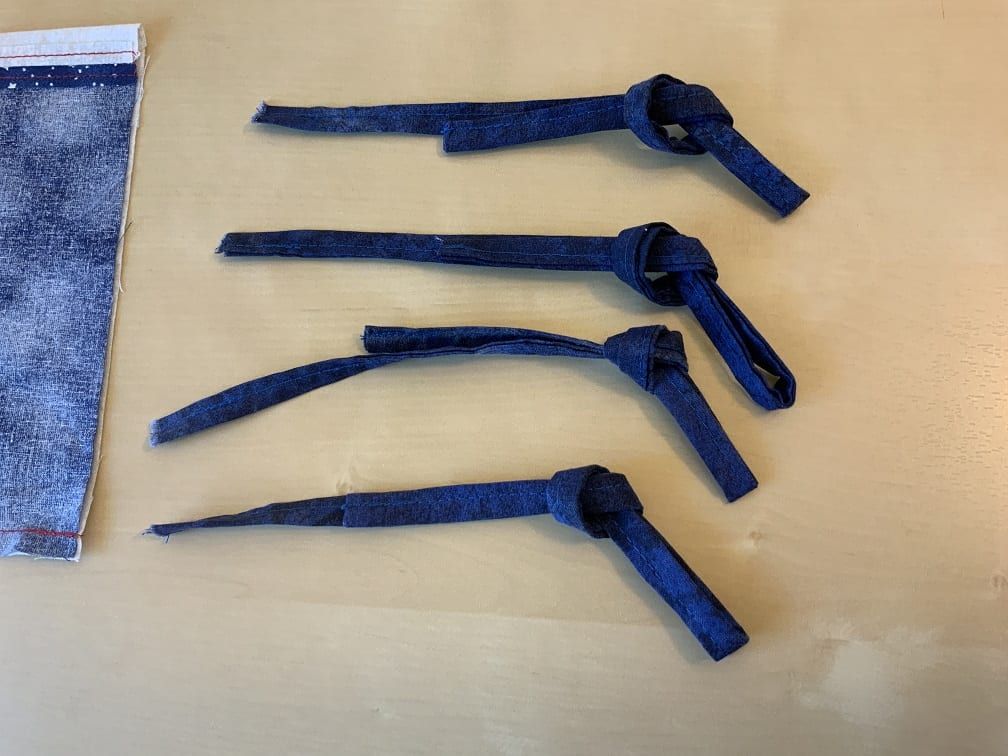
Knot each tie on itself to shorten it.

Fabric Mask Assembly

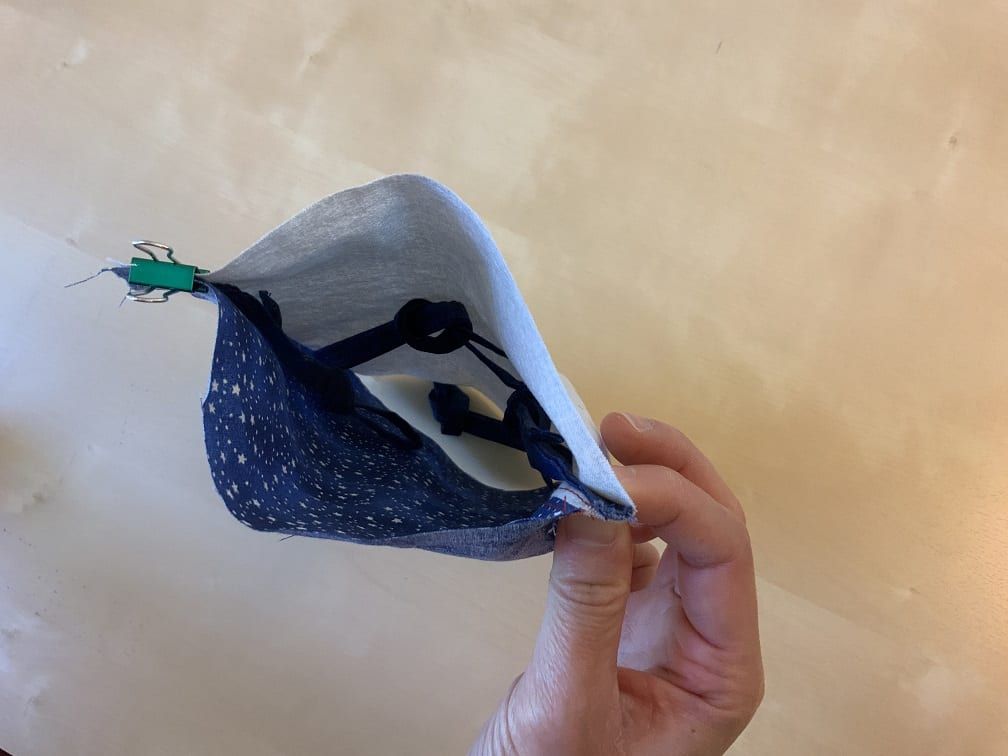
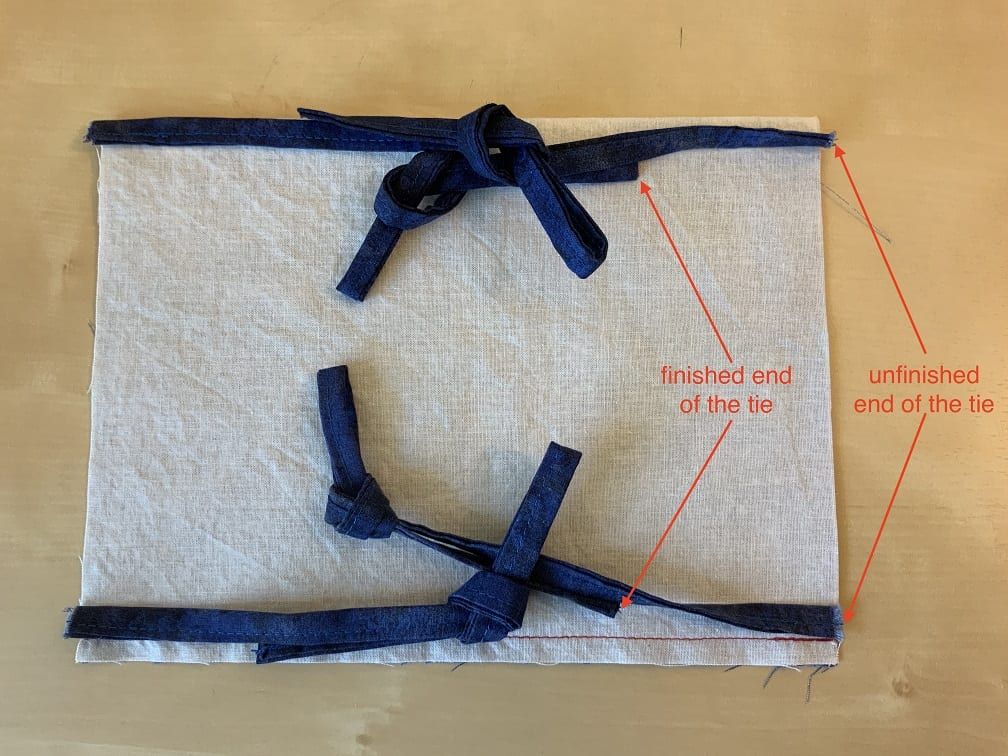
Line up and clip the unfinished end of the tie to each of the four corners on the inside. Position the ties so that they are not visible from the outside.

Fabric Mask Assembly

For illustrative purposes only, the ties in the photo are placed on top of the fabric so you can see how they should be aligned at the corners. 

Do NOT place your ties above the fabric. They need to be inside, as shown before.

Fabric Mask Assembly

It should look like this.

Fabric Mask Assembly

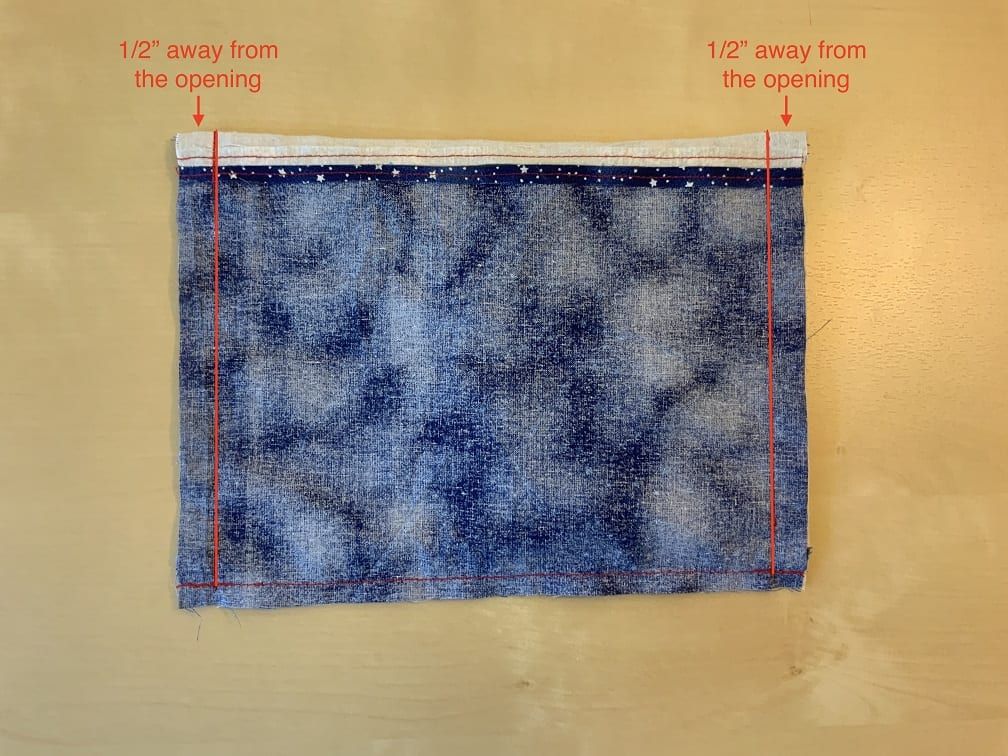
Sew two lines that are ½” away from the open edges. Tip: If you are using a machine, sew slowly, and manually turn the wheel due to the added thickness of the ties.

Fabric Mask Assembly

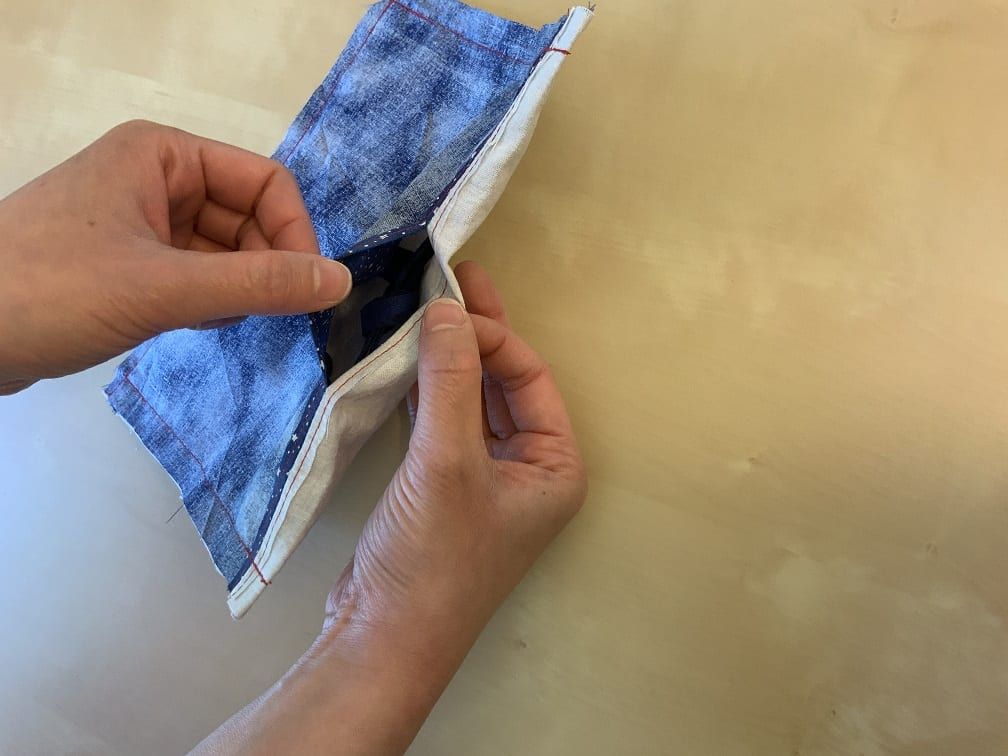
Flip the package inside out through the 3” gap between the two 3” long stitch lines.

Fabric Mask Assembly

Pull on the straps to straighten the mask. 

Tip: Iron the mask to make the edges sharper and easier to pleat.

Fabric Mask Assembly

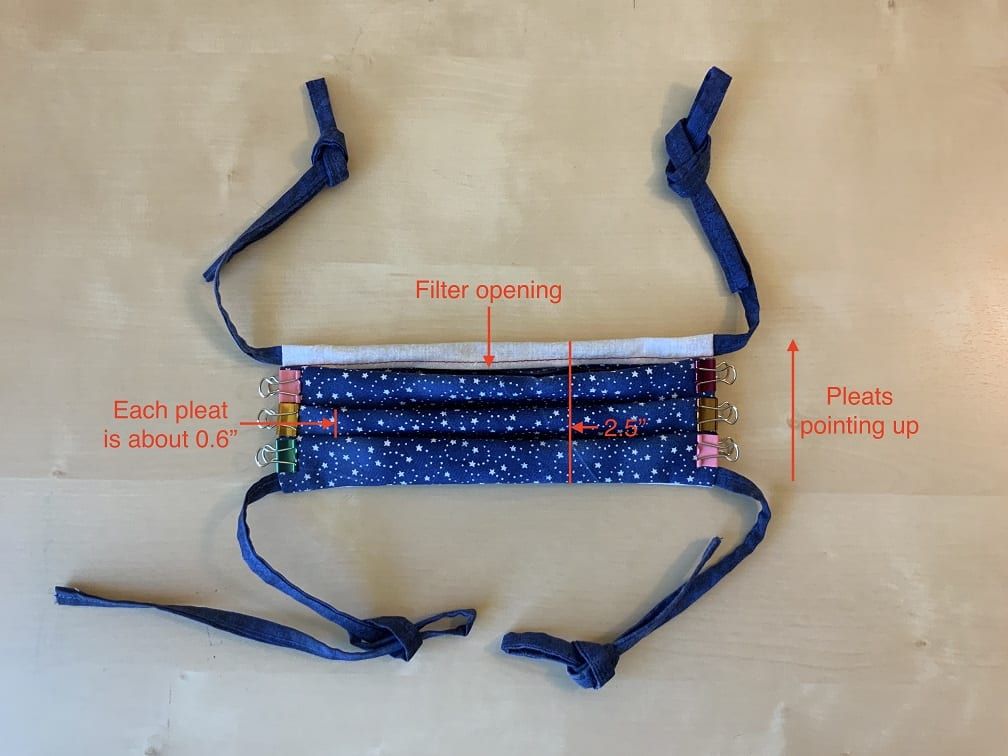
Position the mask with the filter opening visible. Fold and clip three ~9/16” pleats, with the pleats pointing up.  Total height of the mask after pleating: ~ 2½”.

Fabric Mask Assembly

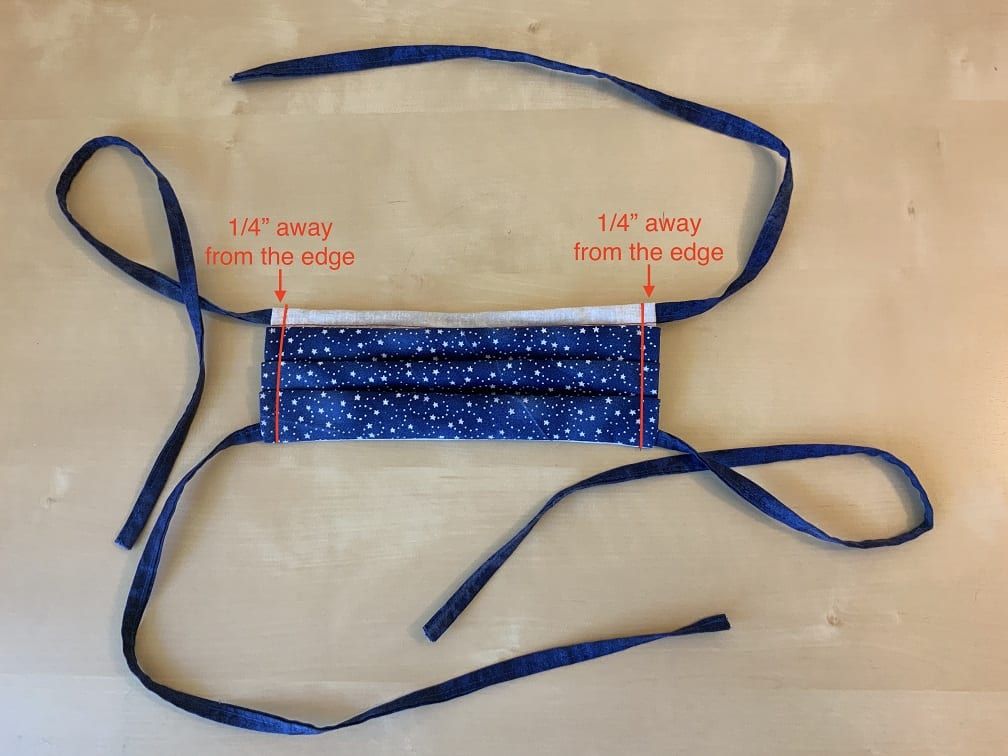
Sew two lines, each ¼” away from the short edge. If your machine is encountering resistance, try going slowly and manually turning the wheel.


Fabric Mask Assembly

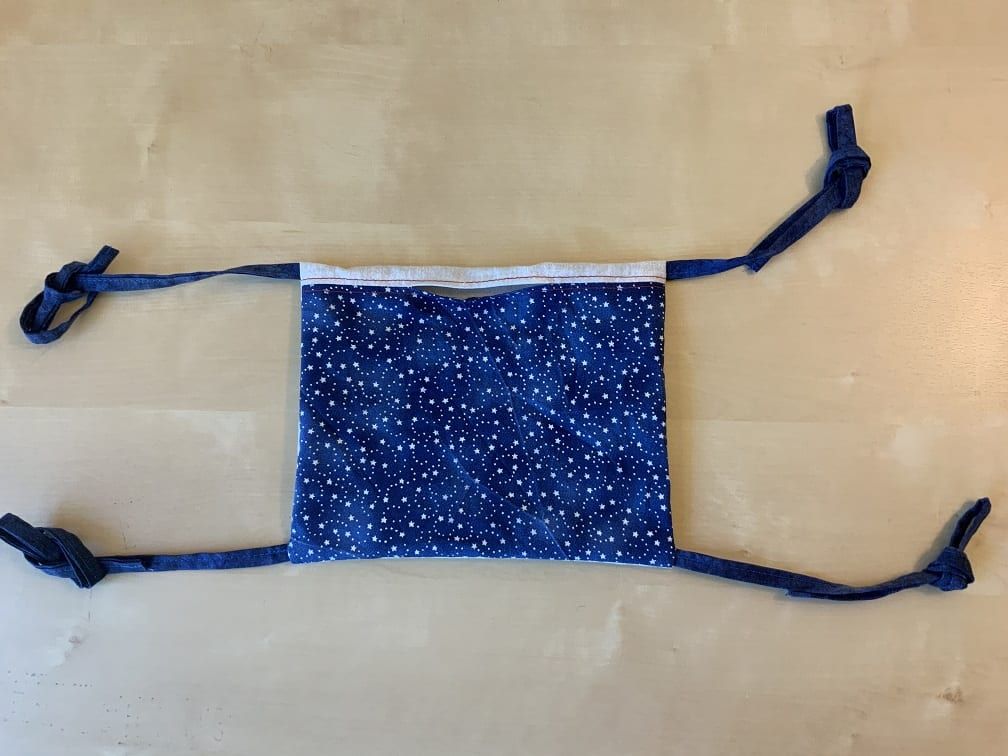
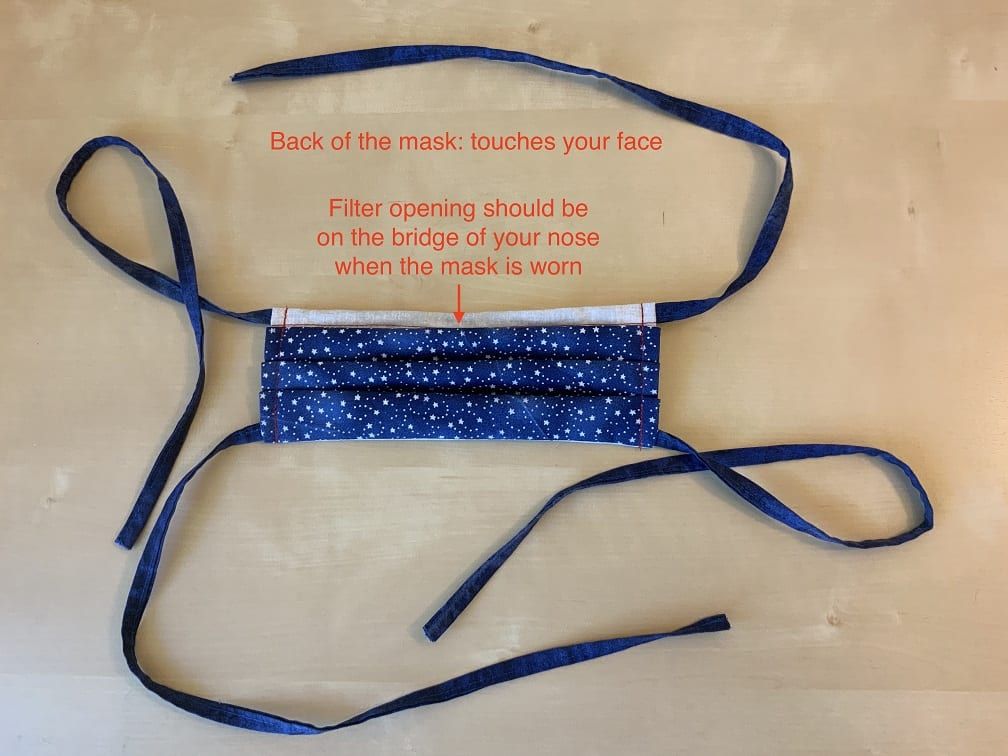
Voila! This is the back of the completed mask.

Fabric Mask Instructions by Vivant Dental

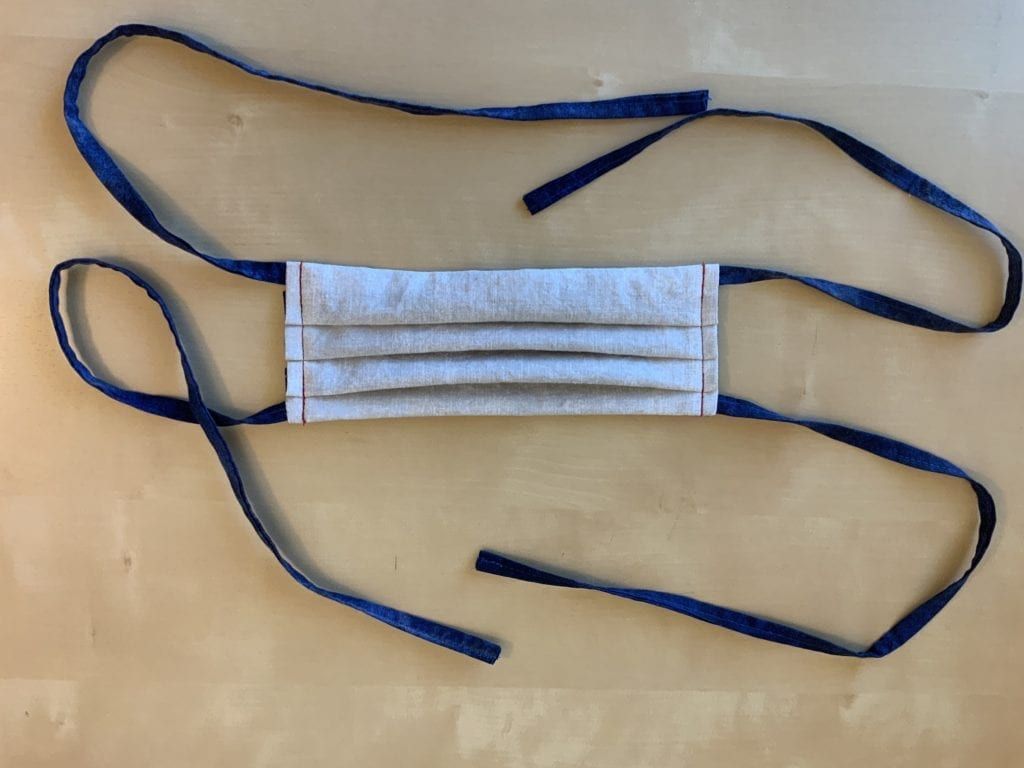
This is the front of the mask.